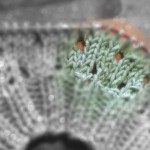
I bought this gorgeous Regia Hand-Dye Effect yarn recently because I love the colours. There’s a shade of blue in there that I could just stare at for hours. I had no pattern in mind when I bought it (which is rare lately; I usually talk myself out of impulse buys by requiring a game plan before I spend money). I just wanted to be able to look at it.

Since its purpose in life was to make my eyes happy, I decided it needed to be knit into something that would play up its colour changes and be constantly where I could look at it. Solution: my new Kindle! I carry it almost everywhere, and it’s just a given that a knitter’s electronics have a multitude of hand-knit sweaters and cozies, so I decided to make Kindle cover number two with this pretty new yarn. (The first cover is a plain, white, wool aran; and even though I love it, it’s white. Blue wins out over white in my world every day.)
Enter: the Sock Yarn Blankie. I’ve been slowly knitting up a real blankie since last summer, and it’s super fun. I’ve also never done entrelac, so continuing with the mitered squares instead of learning a new skill during my last, gooey-brained trimester seemed like a good idea to me. Could I adapt the blankie pattern into a pocket shape or not? It turns out I could, and it was ridiculously easy.
Here’s how you do it:
First, I made two mitered squares. Since the sock yarn blankie casts on 31 stitches, that’s what I did. It turns out that that makes overly large squares, and I now have to sew the sides of my cover to tighten it so the Kindle won’t slide out, but oh well. I have another half ball of the pretty yarn left, so I’ll knit up a second cover with smaller squares to make the fit more snug.
But if you want to get started already making your own cover, this is what you do: using fingering-weight yarn and size 1 US (2.25 mm) needles (I used a circ and treated it like a straight), cast on a reasonable number of stitches that can be divided by two (30 divided by 2 is 15) plus one (hence, 31). Knit a test square to see what size it comes out for you. The measurement you’re aiming for, corner to corner, is slightly less than half the width of your Kindle. I say slightly less because my two 31-st squares were each half, but then when I joined them with other squares, the width expanded to be 1/4″ too wide on either side. Yikes! So even a little more than “slightly” would be good, since the cover will work best if it’s a little snug; then it won’t be randomly slipping off and leaving your poor Kindle naked and at the mercy of whatever else might be in your bag at the time.
But I digress. The formula for making a square is to cast on your even number plus 1, then work in garter stitch, decreasing the centre three stitches of each right-side row with a cdd (sl2 as if to knit, k1, psso). Use an edge stitch to keep your edges neat and easy for picking up stitches later. (The edge stitch is, simply, slipping the first stitch of every row purlwise, with yarn in front, and knitting the last stitch of every row.) Keep decreasing in this manner until you have three stitches left. On the right-side row (the decrease row), to decrease the last three stitches into one, sl1 as if to purl (with yarn in front), sl1 as if to knit (with yarn in back), k1, psso. Cut yarn and pull through.
(For the sake of this formula, I’m going to pretend that we’re all working with 31-stitch squares. Substitute your own numbers once you’ve knit up your gauge square.)
Once you have two independent squares, you’re going to join them together by picking up and knitting a new square between them:

Pick up and knit 15 sts along the top left side of the right-hand square, CO 1, pick up and knit 15 sts along the top right side of the left-hand square. 31 sts are on your needle. (You’ll notice that the edge stitch has made a neat little line of stitches along the edge, and there are 15 of them; I pick up both sides of the stitch, the whole “v.”) *Make sure to always pick up and knit your stitches with the right side facing you.*
Knit one row, then commence with the centre double decreases once you’re on the right side again, and decrease as for the first squares.
Now you have three squares, all attached together. Rotate them so the new square is pointing down:

Now, you’re going to pick up and knit a new square, just like you did already, but along the two cast-on edges of the first two squares. The only difference is that instead of casting on 1 st between the two squares, you’re going to pick up one stitch from the point of the already-made third square.
Next, it’s time to make the bottom corners. This is pretty cool. You’re going to rotate your work again, so the outer edge of one of your first two squares if pointing up. You’re not going to join two squares together this time, but instead pick up 15 stitches from the [now] top right of the square, one stitch from the point, and 15 more stitches from the top left of the square:

Do the same thing on the opposite corner. Now your shaping is done, and it’s just joining more squares from here on out until your Kindle cover is the right height.
(If you want your cover to open at the side instead of the top, you can see how easy it would be to create a base of three squares instead of two, thereby making your cover wider to fit from top to bottom.)
Next, I built on my base with more squares, picking up 15 sts from the right, one from the top of the square below, and 15 more from the left for each one:

Then, I decided it might look nice with a bigger, focal square, so I built the sides two squares high to leave room for a big one in the middle:

To make the big square, I picked up and knit 30 sts down the right, one in the middle, and 30 up the left. Then I worked my decreases as for the smaller squares, but obviously with more of them. Ta-da! A big square:

Because I liked it so much with the big square, I did the same thing on both sides. You could easily leave the big squares out and just have small squares all over, or put just one big square, or have your big square wrap around the side instead of being centred on the front.
My big squares brought me to the height I wanted for the Kindle cover, so I decided not to make it any taller. I filled in the sides with small squares (one on each side):

I didn’t want to leave the top looking jagged, so I figured I’d knit half-size squares (aka triangles, haha! Remember? Third-trimester mushy brain?) to fill in the gaps.
The way to make the triangles to straighten up the top edges is like this: Pick up and knit 31 sts just like you would for a square. Then, on the wrong side (very first row), do your edge stitch (slip the first stitch as if to purl), k2tog, knit across to the last three stitches, k2tog, k1. Work the right sides as you would for a regular mitered square, decreasing the centre 3 stitches each time with a cdd. Work like this, decreasing at both ends of every wrong side row and in the centre of every right side row, until there are only 3 stitches left (after a right-side row). The next wrong side, sl1 as if to purl, k2tog, psso. Cut your yarn and draw the tail through.

There you have it! A pocket made of mitered squares with which to cover your Kindle. You can, if you like, pick up and knit a border around the top. Ribbing, more garter stitch, even some button holes or handles would look really cute. The choice is yours! And I’d love to see what you come up with. 🙂


Great pattern! You think this could be adjusted for an iPad??
For sure! I don’t know how big an iPad is, but all you need to do is adjust your square size, either by changing needles or changing the number of stitches you cast on. I’d just use the sizing guidelines I gave in the post (making up a square, then testing to see if, from corner to corner, it’s about a 1/4 inch less that half the width of the iPad) and adjusting it as needed until you think you’ve got a good fit. Mitered squares are just so darn adaptable. 🙂
The dimensions on it are:
Height:9.56 inches
Width:7.47 inches
Depth:0.5 inch
So then you’d want your squares to be about 3.5 inches from corner to corner. Start by casting on 31 sts and knitting up a square. (It’s small, so it won’t take long.) If its dimensions are close enough, then keep on with the pattern. If it’s way too small or too big, then rip it out and adjust your number of stitches accordingly.
Thanks a bunch!
I don’t have a Kindle, but I can use it for other things. Thank you for the pattern and the how-to pics. They really help. You have a new follower. Karen
This is such a clever pattern! I’m knitting the Sock Yarn Blankie and I would never have come up with this idea, particularly the turning of the corners. So I’m very impressed!
Looks like a fun pattern
So .. if I bought a skein of Noro sock/fingering weight yarn or another bright colored yarn like in your photo, it should be enough?
Yes. I used a 100-gram skein of sock yarn and I think I still have at least half of it left, probably more.
So, are you knitting up your square, then clipping off the remainder of that color to get the new color for the next square? They all look like solid colors. Thanks for the pattern, this is going to make a great Christmas gift for a couple of my friends!
I do cut the yarn between each square. It leaves a lot of ends to sew in. 🙁 I bet you could, in some instances, leave the yarn uncut and just start picking up stitches, but I’d be careful with that, since it might mess with the tension at the corners. (As for my yarn, it’s all from one ball, but the colour repeats are long so each square only has minor variations of colour in it. If you look closely, you can see them.) Hope that helps! Let me know if you have any other questions. 🙂
What is the size of the finished Kindle cover?
Carol, there isn’t a concrete answer to your question, since all I’ve given here is a formula for making your own cover. You would need to knit up a test square of your own and adjust your stitches so that the square (measured from corner to corner) is just under half the width of your device. That way, you can custom fit your cozy for any item you want to cover, whether it’s a Kindle, Kobo, Nook, or *gasp!* paper book. 😉 You could even make tiny squares and cover up your phone.