Choosing the Right Yarn for Your Knitting Project: Quick Guide

So how do you know which yarn to choose for your project? Well, there are many options. Let’s talk about them.

But first, does it have to be the yarn suggested by the designer? No. No, it does not. But it should probably have some similarities.

The qualities to look for when choosing yarn for your project

Fiber content. What the yarn is made of affects so many things: how to wash it, how it drapes, how it feels, and how it lasts. Try to choose a yarn with a similar fiber content to the one suggested. It doesn’t have to be identical. Just not opposite. For instance, if you’re knitting something lacey or cable-y, choose something you can block to shape, like a wool or cotton. Acrylic will just spring back into its original form and won’t hold blocking. Very sad. (More on blocking later this month.)

If you want something cozy that also breathes, choose wool or superwash wool.

If you want something super drapey, choose bamboo (viscose), silk, or cotton, or a blend that includes them.

If you want something machine washable and dryable, choose acrylic, cotton, bamboo, or superwash wool.

If you want something luscious that will look amazing forever, choose cashmere, wool, silk, or a blend thereof.

If you want something super soft, choose merino (a type of wool), alpaca, cashmere, silk, a nice acrylic, a nice cotton, angora, mohair… The list could go on. There are so many gorgeous yarns out there.

If you want a workhorse yarn for making dishcloths, cheap cotton is the way to go.

If you want a workhorse yarn for making warm outerwear that’ll get dirty and used and worn lots, use any old 100% wool with multiple plies. (Plies are strands all twisted together.) If it’s itchy, it’s okay because it won’t be worn next to the skin.

If you want to make chemo caps or something for sensitive skin, use something soft and luscious with no hairs. Use the “soft” list above, but scratch off alpaca and mohair. They have hairs in them that make many people itch.

If you’re making baby soakers or longies, 100% wool is the only way to go. Keep in mind that wool refers to all animal fibers, not just sheep’s fleece. I love wool, but I’ll have to save my reasons for a different post.

Yarn weight. The term “weight” here actually refers to the yarn’s thickness. You’ll want to find a yarn that’s the same weight as the one the designer recommends. Yarns can also be classified by their gauge: how many stitches per inch they knit up to. The standard North American weights, in order from finest to thickest, are

  1. Lace weight
  2. Fingering weight or Sock weight
  3. Sport weight or Baby weight
  4. DK weight or Light Worsted
  5. Worsted weight
  6. Heavy worsted or aran
  7. Bulky
  8. Super bulky

Sometimes, they get grouped together, but I really do find there’s a difference between Worsted and Aran. Also, lace weight can be found as super-fine cobweb lace or slightly heavier lace, but they’re all grouped together in one inadequate category.

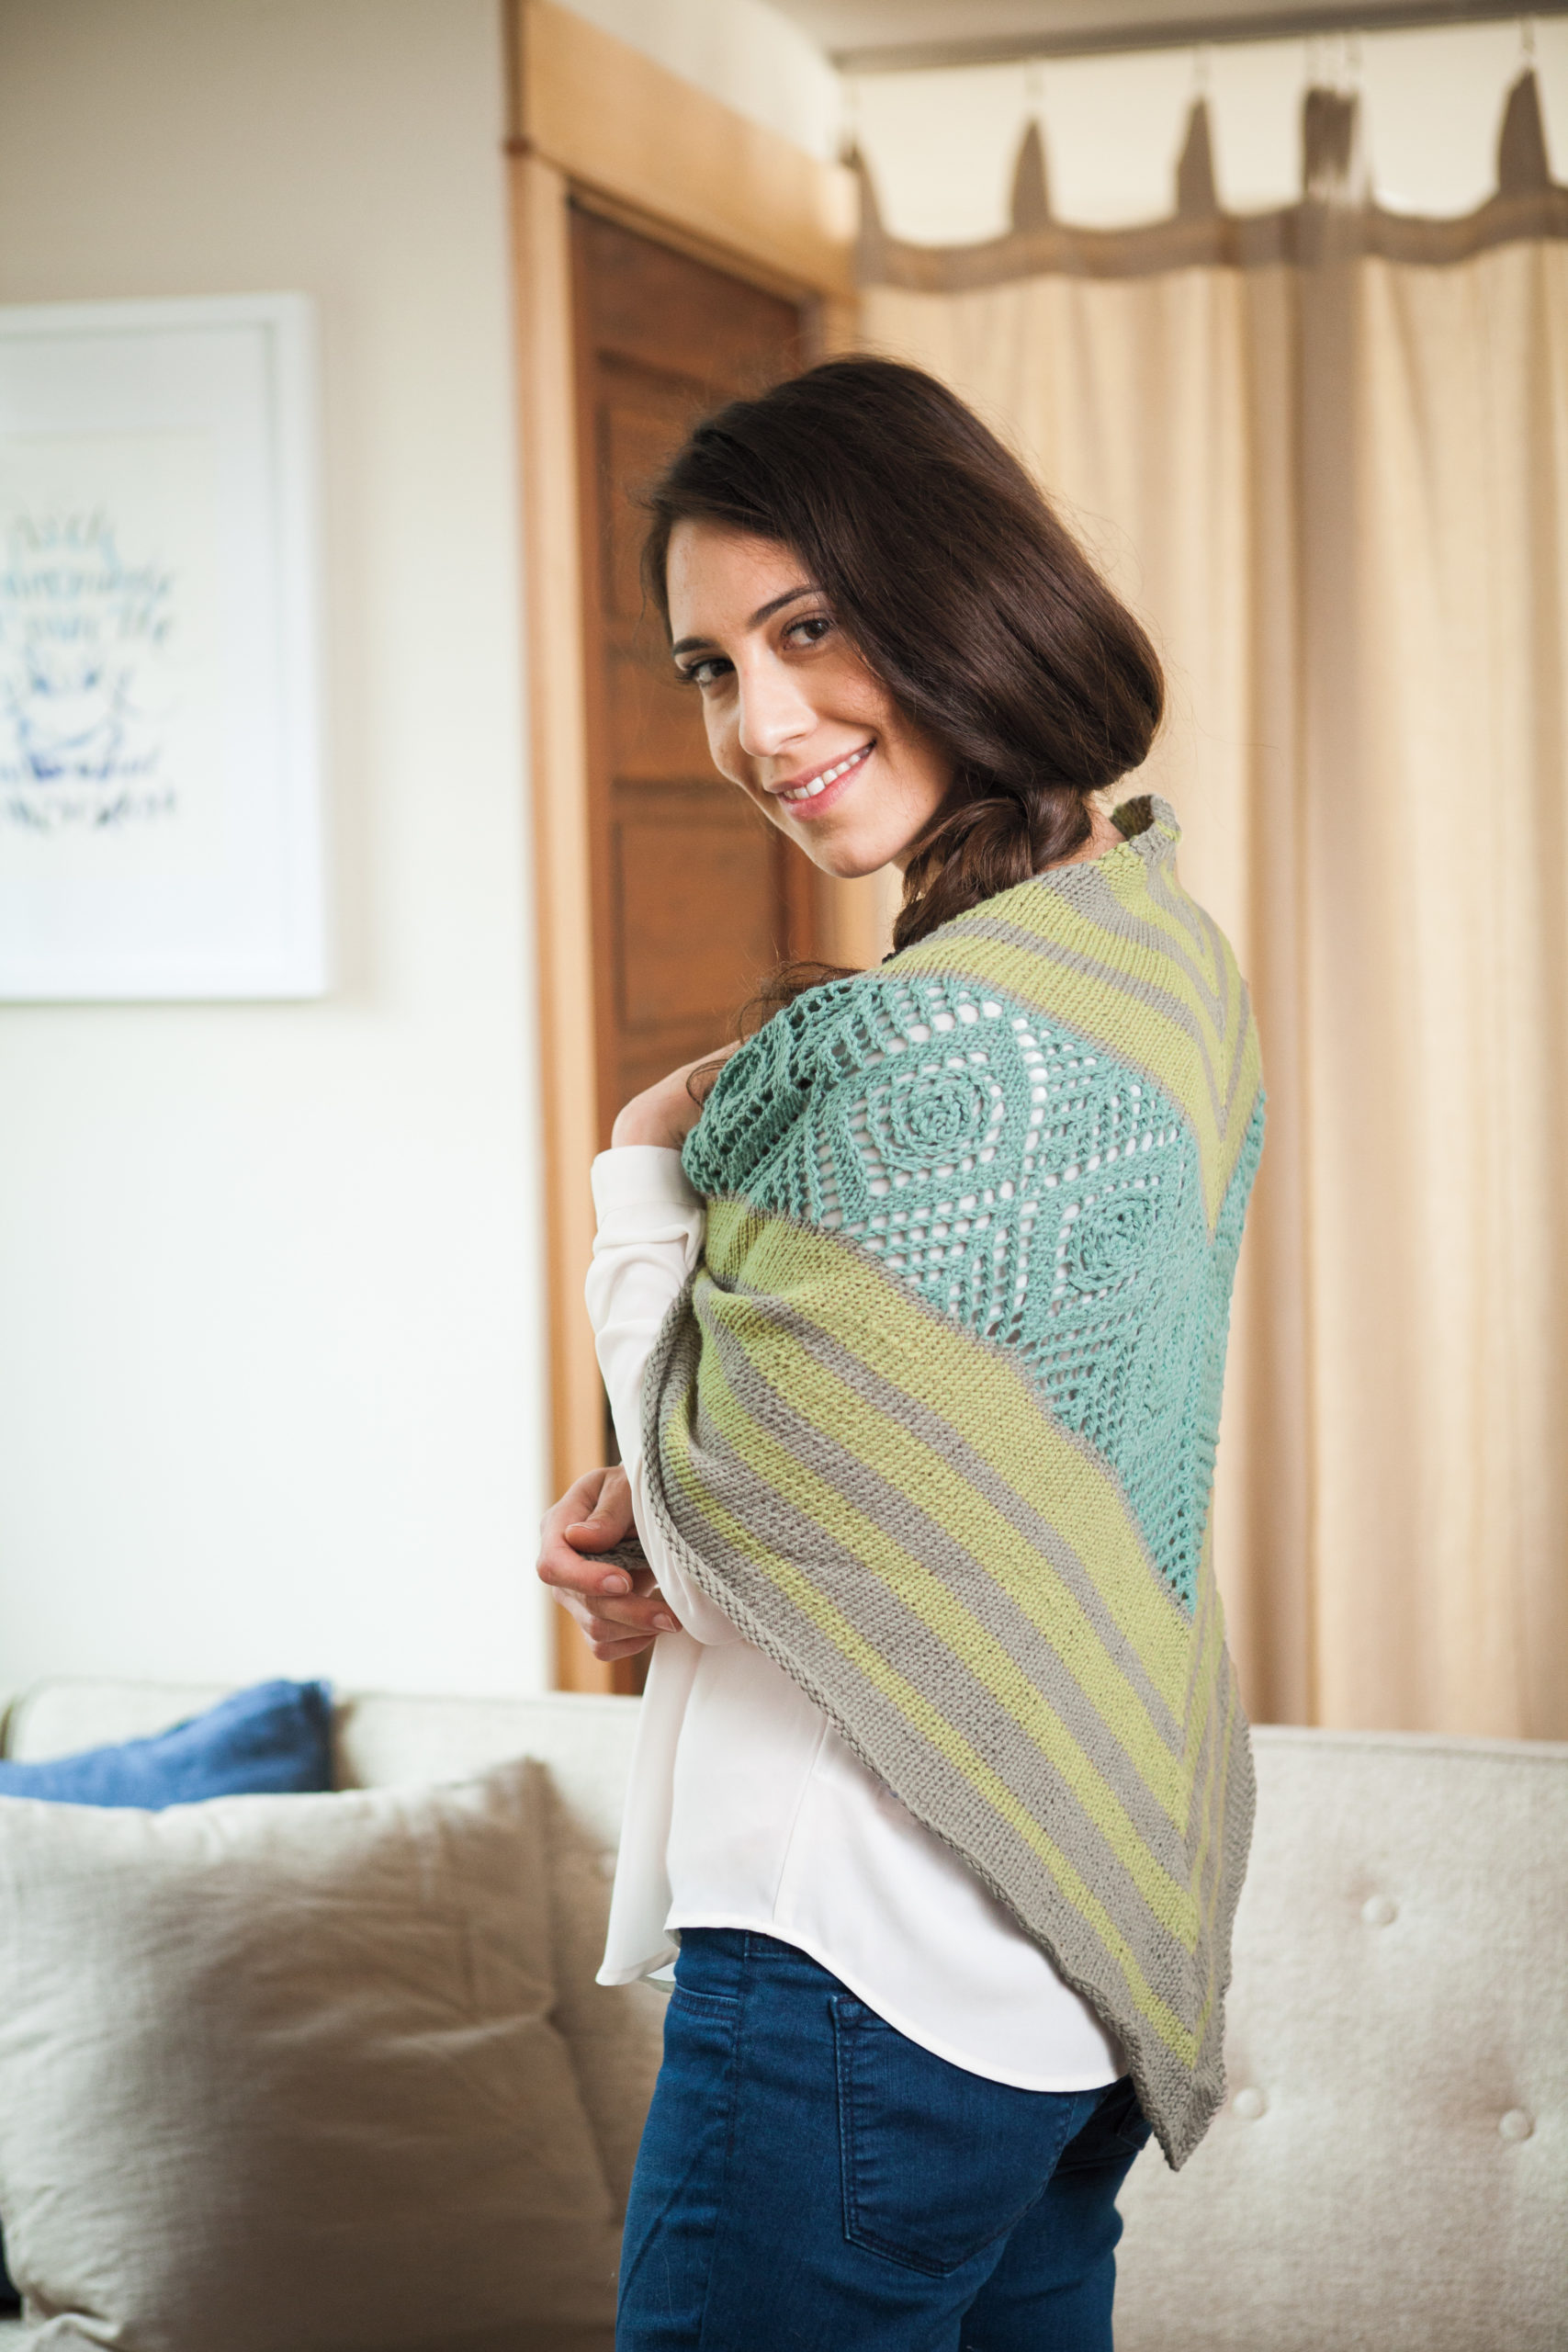
Colour. This is really a personal choice, so I have only one thing to say: If you’re going to spend hours working an intricate stitch pattern (lace or cables come to mind), don’t use a variegated yarn. All those colours will just drown out your fancy stitches. What a waste.

And those are the basics. A quick primer in yarn choices. Did I miss anything? Leave me a comment and let me know what you think.

How to Get Perfect Tension in Knitting. www.aknitica.com #knittingtips

This post is part of my 31 Days to Your Nicest Knitting series. Every day, I’ll post a new tip or trick to make your knitting nicer. You can follow along easily by subscribing. If you have any knitting problems you’d like me to fix, let me know and I’ll try to answer your question as part of the series. You can find all the posts in the series here.


How to Get Perfect Tension in Knitting

Do you ever get grooves between your purl rows? Or find big, oversized knit stitches randomly scattered throughout your stockinette?

Most of us have knit stockinette stitch and been disappointed when it didn’t look perfectly smooth. On the right side, it looks like every other row of knit stitches is oversized. On the wrong side, there are grooves between the rows. Oh no!

There’s a simple explanation: most of us purl more loosely than we knit.

The way to fix it is a little more complex. Sometimes, just knowing what you’re doing can be enough to make it change. Concentrate on keeping your tension tighter on the purl rows. (If you knit with the yarn in your left hand, loose purls are more likely to happen to you.)

Ways to tighten up those purls

  1. Some knitters find that wrapping the yarn under the needle (instead of over the top of the needle) when purling tightens the stitches up. What’s actually happening is that because the yarn is wrapping with less distance, the bagginess of the stitches disappears. Good, right? Yup, totally fine. But just watch out if you do this because wrapping the yarn the opposite direction means that now all your stitches are mounted backwards. So, on the knit row, you’ll have to knit into the backs of the stitches to straighten them up. Otherwise, you’ll end up with every other row of stitches being twisted.
  2. Try purling with the other hand. It’ll feel incredibly awkward at first, but it could work. (I first learned to knit as a “thrower” with my right hand, and my purl tension was perfect. Now that I mostly knit continental with my left hand, I have to really tighten up my purls, and they still don’t look quite right half the time. I’m tempted to switch back to the English method just for flat stockinette projects.)
  3. Purl onto a smaller needle. You’d have to switch needle sizes for every row, but it might make all the difference.
  4. Knit looser and purl the same.
  5. If you just can’t knit looser, or you’re concentrating so hard on tightening your purls that now your purls are too tight… Do what I did and just knit AND purl really tight. It was a weird fix, but for me, it worked. The key is to pay attention and adjust what you need to adjust in order to make it work for you.


Now, if your problem isn’t lines of large stitches, but bunches of them scattered all over the place, that’s something else entirely.

Random, large, loose stitches scattered throughout your stockinette are caused by the way you move your stitches along as you knit them.

If you tend to knit a whole pile of stitches until they’re all bunched up together on your right-hand needle and you absolutely must push them along so you have more space to knit… well, you’re creating a tension problem.

If you knit with your stitches spread so far apart that you can barely slip them off the left needle tip because they’re so far away… you’re creating a tension problem.

Those bunched-up or spread-out stitches are giving more and less yarn to different stitches as you knit them. The goal is to give every stitch the same amount of yarn.

To fix this, keep your stitches comfortably moving along at a steady pace. Don’t stretch them apart. Let them stay at a relaxed, easy distance. Don’t bunch them together. Keep them moving.

I use my right thumb to push my stitches along the right-hand needle after they’ve been knit, and my left thumb to move stitches up to the left needle tip to be knit. You might choose to use your fingers or whatever. Just keep them shuffling along at a steady pace. It’s okay to do this every 3 or 4 stitches or so, but every 10 stitches is too many. Make sense? Your hands will find a nice rhythm after a little while, and before you know it, you won’t even have to think about tension anymore.

You may also need to make sure you’re keeping your working yarn (the strand in your hand that’s attached to the ball) at an even tension. Every knitter tensions their yarn slightly differently. Some of us loop it around our little fingers, some hold it between fingers or clench it in a curled-up finger… Just be aware of what you’re doing so you can troubleshoot and see if you need to try a new method for tensioning your yarn. Like any new skill, it might feel awkward at first. But if it gets you nice results, keep doing it until you develop your muscle memory. Then, your fingers will do it for you.

What do you think? Does your tension need work? What has worked or not worked for you in the past? Leave me a comment and let me know.

How to Get Perfect Tension in Knitting. www.aknitica.com #knittingtips

This post is part of my 31 Days to Your Nicest Knitting series. Every day, I’ll post a new tip or trick to make your knitting nicer. You can follow along easily by subscribing. If you have any knitting problems you’d like me to fix, let me know and I’ll try to answer your question as part of the series. You can find all the posts in the series here.

How to Get Rid of Ladders and Wonky Edges in Knitting

I use this trick all the time when I’m knitting in the round. It is my number one, always-given bit of advice in my classes, too. I learned it from Cat Bordhi originally because she’s awesome.

Here it is:

Every time you change needles (when using DPN’s, 2 circular needles, or Magic Loop), work the first 2 stitches, then give the working yarn a good tug to tighten them up.

Tugging after working just one stitch doesn’t help. It’ll just get loose again. But if you tug after knitting two stitches, they keep each other snug.

Ladders (loose, horizontal bars of yarn between columns of stitches) are formed because gravity pulls on the needles, which pull on the knitting where they meet and loosen things up. Even if you knit with a constant tension, the needles will make the ladders happen if you don’t do this extra step. Giving the first two stitches a tug is essential. It won’t make your knitting too tight unless you go crazy with pulling. A nice, quick tug on the working yarn will do the trick.

This technique also works great when knitting flat. Work the first two stitches of the row, give the yarn a tug, and keep going. Your edges will be nice and neat and even from now on.

I also do this when I’m working short rows. After doing the wrap and turn (or whatever method I’m favoring that day), I work the first two stitches, then give them a tug.

It’s also perfect for making tidy I-cords.

Basically, every time you turn your work or start a on new needle for any reason, give the first two stitches a tug.

How to Get Rid of Ladders in Circular Knitting. www.aknitica.com #knittingtips

This post is part of my 31 Days to Your Nicest Knitting series. Every day, I’ll post a new tip or trick to make your knitting nicer. You can follow along easily by subscribing. If you have any knitting problems you’d like me to fix, let me know and I’ll try to answer your question as part of the series. You can find all the posts in the series here.

31 Days to Your Nicest Knitting

31 days to your nicest knitting series. www.aknitica.com #knittingtips

If you’re a knitter who loves little tips that make your knitting look better, or that make your life easier, then I hope you’ll join me for this new series: A tip a day for the month of October to get you to your nicest knitting possible!

I don’t know about you, but I love knitting. I knit every day. But I hate it when I spend a ton of time time on a project and it ends up living at the bottom of my sweater drawer. It’s so disappointing, and I feel so guilty about wasting all that pretty yarn, and yet the thought of ripping it all out makes me cringe…

But, I’m happy to say that that hardly ever happens to me anymore. I’ve learned so many great tips from books and teachers and friends over the years. What I want to do this month is send you one of those little insights every day. One tiny tip in your inbox (if you’re a subscriber) or here on the blog that will help you take your knitting up a notch. Maybe even relieve a little frustration. Knitting should be fun and relaxing, after all.

What inspired this sudden series? Well, I have writer friends. And a bunch of them are participating in this “Write 31 Days” challenge, so of course I went and read all about it. And it sucked me right in. I’ve been meaning to compile all my favourite tips and tricks for knitting in one place, so why not do them one at a time, every day, for the month of October? The point is to write every day, but to make it short and sweet. So that’s what I’ll be doing.

You can expect to learn about things like sewing in ends, joining new colours, eliminating ladders and weird tension, getting gauge, choosing increases & decreases when the pattern is vague, and more.

You’ll be able to find all the tips together in one place right here for a while. (I may eventually put them together into a handy ebook. One thing at a time, right?)

So here’s where we can have some fun. If you have any knitting woes, questions, conundrums, or favourite bits of advice, send them to me. I’ll include them in the series. By the end of October, I want you to feel like your knitting has improved and you’ve learned at least one good thing that you didn’t know before.

So, what problem do you want me to fix for you this month? Leave me a request in the comments.

Scintillate Shawl Knitting Pattern and Super Special Discount

It’s the weekend, and who doesn’t want a deal on an addictive shawl knitting pattern? I’ve just made my “Learn to Knit a Lace Shawl” class exclusive pattern available to everyone. I hope you like it, too.

I’ve named it Scintillate. It is covered in diamonds, after all. Whether they shine or not in real life is totally up to you and your yarn choice.

Scintillate Shawl pattern by Amanda Schwabe. www.aknitica.com #knitting  #shawls #cozy

I made this shawl with beginning lace knitters in mind. I wanted to give them something pretty yet simple to work on. I love knitting diamonds because of the beautiful, straight lines they make. It’s so easy to see if a yarnover is out of place. If you keep looking at your knitting, mistakes are easy to spot and fix before you’ve gone too far.

Scintillate Shawl pattern by Amanda Schwabe. Great wrap for cool weather. #knitting #aknitica #shawls

The overall lace patterning has a lovely rhythm to it, too. After a while, you’ll have memorized the pattern and be able to anticipate what should happen next. It keeps things interesting while giving a comforting sameness all at once.

This has become one of my favourite shawls to wear. The Manos del Uruguay Fino is cozy and squishy, and the shawl size I got from 1.5 skeins makes it a perfect wrap. You can knit yours in any size, as a neckerchief or an even larger shawl. You can also use any yarn you want. One of my students made two versions: one with fingering-weight yarn and one with worsted. The worsted one is thick and luscious, and I might have to copy her idea soon.

My little Eva modeled it for me. It really is grown-up sized.

The pattern includes options for three different edges to finish it off. You can knit it with no special edging, with a narrow garter-and-zigzag border that flows out of the diamond tips, or with a wider large-diamond border, like the one in my pictures here.

And, as promised, as a subscriber to my site, you get a coupon code for the Scintillate Shawl pattern! It will be good until the end of September, and you can feel free to share it with your friends. With the code, the price goes down from $6 to just $0. That’s less than a cup of coffee. Heck, that’s FREE. Yes, free. Zero dollars. Just because I like you.

[box type=”note” icon=”none”]Scintillate Shawl coupon code: COZYUP[/box]

You can grab your pattern here, but hurry! The coupon code only lasts as long as September. Once October hits, it’s gone.

If you’ve just popped over to see what the free coupon code is all about, welcome! I have other free patterns available, plus some goodies that I like to think are worth paying for. 😉 If you subscribe, you’ll get future discounts and even knitting tips in your inbox. 

Scintillate Shawl pattern by Amanda Schwabe. www.aknitica.com #knitting #shawls


Happy knitting!


How to Sew Invisible Vertical Seams in Knitting with Mattress Stitch

Anybody else here hate finishing?  Sewing up?  Yeah, me too.

Until recently, that is.

I always dreaded it because I didn’t know what to do.  And I didn’t want to mess up my beautiful knitting with crappy sewing.

The solution was staring me in the face, but I didn’t want to acknowledge it:

Learn to sew.

Now, I will be the first one to tell you that I’m a knitter, not a sewer.  But sewing with yarn?  I guess I can accept that.

I’ve learned a couple sewing techniques that have made finishing my knitting practically stress free.

Some of them can be applied in most, if not all, finishing situations.  The first and favourite of mine is Mattress Stitch.

Mattress stitch is also called Ladder stitch.  You can find it in any good knitting reference book, but they don’t always tell you when to use each stitch.

Mattress Stitch is perfect for sewing invisible side seams in sweaters, for sewing in sleeves (especially raglans), and for sewing amigurumi.  It forms a beautiful, invisible vertical seam, and it’s really easy to do.  (To connect a vertical seam to a horizontal seam, I usually use a hybrid of Mattress Stitch and Grafting, which I’ll show you in a future post.)

Because Mattress Stitch is sewn with the right side facing you, you can easily tell that your stitches are lining up — or notice quickly that they’re not and fix them.

Let’s get started.

Mattress Stitch connects running stitches.  Those are the little horizontal bars of yarn that join two knit stitches together at their feet (on the back side).  In this picture, I’ve picked up every other row of running stitches.  If you look closely, you can see they connect to the bottoms of the V-shaped knit stitches on either side.

Running stitches -- the "feet" that connect knit stitches.  How to: Mattress Stitch.  aknitica.com

To begin Mattress Stitch, grab a running stitch from bottom to top and pull your sewing yarn through.  Make sure that you’re picking up the running stitches from the same column each time.  Notice that the running stitches are actually hiding behind and between two columns of V knit stitches.  Don’t grab the horizontal bars that are in the middles of the V’s themselves.

(You can use a tail already connected to the project, or a separate pieces of waste yarn. You’ll need it to be about 12″ longer than the seam you want to sew. If you’re using a separate piece of yarn, leave a 6″ tail at the beginning for sewing in ends later.)

With a blunt darning needle, sew through one running stitch on one side of the seam, then on the other.  Like so:

Why I Love Mattress StitchBegin by sewing into the very first running stitches in the column above the cast-on edge.

Why I Love Mattress Stitch: A How To

Continue sewing into the running stitches, alternating sides, until you’ve reached the last ones.

2014-03-15 001 2014-03-15 010

You might notice that your seam is a little loose at first, like this:

Mattress Stitch: Invisible Vertical Seams!  aknitica.com #sewknitting #finishing #knitting #tutorialsAll you need to do to fix that up is give the sewing yarn a good tug from both ends.  (If you’re sewing with the tail from the cast-on edge, then just give the one end a tug and it’ll do the same thing.)  Then, voila!  It will look like this:

2014-03-15 001 2014-03-15 011An alternative way of working Mattress Stitch is to catch two running stitches at a time on each side of the seam instead of one.  It sews up a little faster that way.  There is a small risk that it could pull the rows off a bit so they don’t line up as perfectly, but I haven’t found that to be the case so far.  Just keep an eye on it as you go, and if you’re not satisfied, switch back to picking them up one at a time.

2014-03-15 001 2014-03-15 015

Mattress Stitch: An Invisible Vertical Seam for Knitting.  aknitica.com #tutorials #knittingYou can also begin and end the seam by sewing one at a time while picking up two at a time in the middle.  It’s your knitting.  It’s your choice.

When you’re all done, the right side will look like this:

Mattress Stitch: An Invisible Vertical Seam for Knitting.  aknitica.com #tutorials #knittingEven though I used bright coral yarn, you can’t even see it on the right side!  I would, of course, use the same colour yarn as my project if it were a sweater and not a sample swatch.

And here’s the wrong side.  Notice:  you still can’t see the coral yarn!  It’s like magic.

Mattress Stitch: An Invisible Vertical Seam for Knitting.  aknitica.com #tutorials #knittingWhen you’re all done, just sew in your ends on the wrong side.  I use duplicate stitch to sew in all my ends now.  It looks fantastic.

What do you think?  Will this help relieve some of your finishing stress?  Feel free to pin this post or share it if you find it useful.


8 Tips for Knitting Lace

Does lace intimidate you?  It certainly looks complicated — but the good news is that if you can follow directions, you can knit lace.

And we already know you can follow directions.  That’s how you learned to knit, right?

But there are some extra things you can do to make knitting lace easier.  So, here are my tips for knitting lace.  There happen to be eight of them.

8 Tips for Knitting Lace.  aknitica.com


Tip 1

Use stitch markers.  Mark off the edge stitches (which lace shawls usually have), the centre stitch(es), and even mark the places where the lace patterning repeats itself in a row.  That way, if you forget a yarnover, it will be so much easier to find your mistake.

Don’t like the feel of hard, plastic stitch markers?  I use little loops of knotted yarn in a contrasting colour.  They’re nice and soft, and I don’t freak out when I lose one because I always have more waste yarn.

Tip 2

Avoid making mistakes by counting, double counting, and triple counting.  Why count like an obsessive lunatic?  Because then you’ll notice a missed yarnover almost immediately — soon enough to fix it easily and continue knitting happily.  Remember those stitch markers from Tip 1?  If you know how many stitches should be between each one, and you double check that none are missing each time you reach a marker, your knitting will get ten times easier.

Tip 3

Look at the chart.  It should show you how the stitches will relate to each other once they’re knitted up.  See that line of stacked centre double decreases in the chart?  That means that those decreases will stack neatly in the knitting, too.  And see how those yarnovers form a diagonal line?  That means they’ll form a diagonal line in your knitting, too.

Now, some patterns are too weird to fit neatly into a chart like that.  That’s why designers sometimes have to use those weird, dark-grey “no stitch” squares.  In real life, lace curves and bends… but graph paper does not.  We do what we can with what we have.  But a good designer will always try to show you how the stitches relate to one another.

A tip about reading charts:  Think of each square as an instruction, not a stitch.  If you follow the little line of instructions across the chart, one by one, you’ll do fine.

Another bonus tip about reading charts:  Make sure you’re reading them in the right direction.  Flat charts get read from right to left on right-side rows, but from left to right on wrong-side rows.  Circular charts are read from right to left on all rows.  If in doubt, start at the side where the row number is written and work away from it.

Tip 4

If you really hate charts and absolutely refuse to use them, or if you just want to know your lace on a small scale before casting on 300 stitches, try knitting a small swatch across just one or two pattern repeats.  That way, you’ll get a feel for how the stitches will interact, and you’ll be able to spot mistakes more easily later on when you start your big project.

I did this when knitting some Estonian lace with nupps, and boy, am I glad I did.  The lace repeat was long and two-sided, and I made some mistakes the first time I tried it.  It went much better the second time.  I knew what I was doing by then, and I could spot my mistakes as I made them… instead of 3 rows later.

Tip 5

Keep looking back at your knitting to make sure the stitches are lining up consistently.  In fact, every time you knit a new row, make sure it’s lining up properly with the stitches underneath it.  Are those decreases stacking or lining up the way they should?  Are the yarnovers in the right place in relation to the ones below?

Tip 6

Knit under good lighting.

Tip 7

Don’t knit lace when you’ll be too distracted to pay attention and count your stitches.  TV and knitting groups are great, but they can wreck your lace before you notice a thing has gone wrong.  Ask me how I know this.  Now, I keep at least two projects on the go: I work on my lace shawl during quiet times or boring shows (Formula 1, anyone?), and I have a mindless project I can work away on during good shows like Call the Midwife or The Big Bang Theory.

Tip 8

Yarn matters.  Especially if this is your first lace project.  Avoid fuzzy yarn, dark yarn that’s impossible to see even under good lights, and clown-barf yarn that will draw attention away from your stitches.  Seriously, do you want to knit an intricate lace pattern that no one will notice because the ten different colours are all yelling, “Look at me!  Look at me!” ?

Just so you know, I’m currently knitting a lace shawl with black yarn, and it’s going to be gorgeous.  But on the needles?  It’s impossible to admire, I can’t get a good photo of it for my Ravelry project page, and it can be tricky to see the stitches.  I sit directly under a lamp to knit this shawl.  It’s not impossible.  I just don’t want you to knit your first lace shawl ever in black and then wail, “But Amanda didn’t warn me about this in that post of hers on lace knitting!”  So now — count yourself warned.

Also on the subject of yarn mattering, make sure you use yarn that you can block.  Acrylic yarn?  No matter what you do to it, it will always spring back into a crinkly blob.  When knitting lace, always use something lovely that has memory, like a type of wool or other natural fibre.  Merino is my favourite.  But superwash, even merino, won’t remember the blocking as well as a plain old non-superwash wool.  It’ll be okay, but not awesome.  Trust me on this one, too.

So, how about you?  Have you had troubles with lace knitting in the past?  What were they?

Are there any tips for knitting lace that I’ve missed?  If so, share them in the comments!   I’d love to hear from you.

Sea Glass Shawl by Amanda Schwabe #summerknitting #Cotlin #KnitPicks #aknitica

If you’re looking for an interesting lace shawl (not necessarily a beginner’s one), check out my newest pattern release, the Sea Glass Shawl, now available through Knit Picks!  And come join us for a knitalong over on Ravelry in the Aknitica Designs group.


Sea Glass Shawl

Are you looking for some interesting summer knitting?  How about something in a nice, light cotton-linen blend, with pretty stripes and lace, that feels good to knit and even better to wear?  And how about a knitalong and giveaway to make it even more fun?

Sea Glass Shawl by Amanda Schwabe #summerknitting #Cotlin #KnitPicks

How about my new shawl pattern?

Sea Glass Shawl by Amanda Schwabe #summerknitting #Cotlin #KnitPicks #aknitica

I had a ton of fun designing this one.  And I had to Google the Pythagorean Theorem and relearn how to use it!  Be impressed.  It was hard.

BUT, now that I’ve done all the hard work, the knitting is easy.  And don’t you love how the lace is in the middle instead of at the edge?  Yeah, I wanted to try something different.  Just because.

It’s kind of like having a necklace in your shawl, right?  Fun.

Sea Glass Shawl by Amanda Schwabe #summerknitting #Cotlin #KnitPicks #aknitica

We begin this beauty by casting on along the bottom edge and then working up in growing-and-shrinking stockinette stripes.  I made a different kind of decrease along the spine to avoid getting a solid line.  Also, I like to try new things.

Here’s where my stupendous, mind-bending math came in:  I had to calculate the distance I had for stripes before the lace panel so I could figure out how many pairs of decreasing stripes I could fit in.  But first, I had to discover the size of the lace.  Then, I had to figure out heights of hypothetical triangles.  Really, I barely remember what I did.  It’s a blur.  But it worked, so I must be amazing.

(I hope you all know me well enough by now to recognize my weird humour.  RIGHT?  Still waiting for that sarcasm font to be invented by someone more brilliant than I am.)

Sea Glass Shawl by Amanda Schwabe #summerknitting #Cotlin #KnitPicks #aknitica


So what we have here is my favourite kind of knitting:  relaxing-yet-not-boring striping stockinette with a splash of interesting thrown in.  The lace panel is, as you can see, a field of mesh surrounding some diamonds surrounding some circles.  With the exception of one row at the very end, ALL the patterning is worked on the right side, and the wrong sides are all purled.

As with all my patterns, I’ve included both charts AND written instructions.  My aim is to please all of the people all of the time.  😉

Some further notes, if you decide to knit a Sea Glass Shawl:

The pattern calls for two balls of CotLin for the lace panel.  My test knitter was able to do it with just one, but I needed a small portion of a second ball.  We wrote “two” because the last thing I want is for you to be like me and run short of yarn!

There are tips in the pattern about how and when to sew in the ends for those stripes.  I really don’t recommend carrying the yarn up the sides because I, personally, don’t like how it looks.  But it’s YOUR shawl!  Do what you like.

You’re welcome to come knit along with others in my group on Ravelry.  I’ll pop in to answer any questions and to ooh and ahh over your colour choices.

That reminds me!  I knit my sample shawl in just two colours (Blackberry and Swan), and it looks fabulous, too.  What do you think?

2013-12-12 15.55.27

Man, it’s hard to photograph Blackberry.  It’s actually a super-deep, almost-black purple.  It’s really gorgeous.  And I like how the high contrast really makes the stripes pop.

But I also love the subtle combination of colours in the Knit Picks sample.  Here’s another colour combo — this is actually the one which I had originally envisioned:

Sea Glass Shawl concept sketch by Amanda Schwabe  #summerknitting #KnitPicks #CotLin #aknitica Sea Glass Shawl concept sketch by Amanda Schwabe Sea Glass Shawl concept sketch by Amanda SchwabeAs you can see, there are so many beautiful possibilities!  I can’t wait to see how everyone else knits this shawl.  Seriously, it’s so fun watching project pages pop up on Ravelry.

Now, for the fun part:  the giveaway!

I have an ebook copy of the entire CotLin 2014 Collection, and I want one of you to have it.  It’s gorgeous.  You can check out the entire collection here to see what I mean.  (In fact, I kind of want to make at least the Band Camp Pullover for myself.  Now that I know how lovely this yarn is, I’m totally tempted.  I bet it would make an amazing, cool-yet-warm sweater.  The yarn is both laid back and high class at the same time.  I guess that’s what you always get when you throw linen in the mix.)

Since I so completely enjoy knitalongs, meeting my fellow knitters, and chatting about colours and projects, I’m going to give the free copy of this ebook to a knitalong participant.

To qualify for the draw:

Head on over to the Aknitica Designs group on Ravelry and tell me what colours you’ll be using to knit your very own Sea Glass Shawl.  Will you use three?  Only two?  Will you go bright or subtle or high-contrast?  Let me know in the group’s Sea Glass Shawl Knitalong thread.

You’ll get bonus points (read: extra entries) for every social media share you connect to this post!  Share on Facebook, Twitter, Pinterest, etc., and then send me an email at amanda at aknitica dot com with a link to each share.  Don’t forget to tag those posts with #SeaGlassShawl

I’ll give you two weeks to enter the draw and order your yarn, and then we’ll get started knitting together!

And then….. da da da DAAAA:  At the end of the knitalong, we’ll have another prize!  Every finished project will be eligible.  I think we’ll have two draws, actually:  one for a hard copy of the CotLin 2014 Collection, which I will mail to the winner, and another draw for a free pattern of your choice from my self-published Ravelry patterns.

Yay!  I think this will be fun.  So, will you be joining me?


Sea Glass Shawl by Amanda Schwabe  #summerknitting #CotLin #KnitPicks #aknitica #SeaGlassShawl

You Could Win a Craftsy Class!

I’m so pleased to announce another giveaway!

It’s from the fabulous Craftsy.  You could win access to the Knit Lab class for free!

Enter to win a Craftsy class

Knit Lab is the perfect class for:

  • Beginning knitters
  • Knitters who need more confidence
  • Knitters who want to learn more skills, like how to increase, decrease, make a buttonhole, knit lace, block, seam, and read patterns.

Basically, it contains all the essentials to becoming a knitter who can make anything.  And, because it’s a Craftsy class, you’ll be able to watch the videos any time, as many times as you like.  You can pause them and make notes and “bookmarks.”  You can ask the instructor any question, and she’ll answer you.  You’ll have lifetime access to your class, and there are no time limits to learning.

Nice, eh?

All you have to do is click this link to enter.  If you don’t already have a Craftsy account, they’ll ask you to make one.  It’s super easy.

You’ll have until Sunday, March 23rd to enter.  Then, Craftsy will send the lucky winner a link to access the Knit Lab class for free.  (Its regular price is $30.99.)

I’ve already taken a bunch of their classes — Lace Shawl Design with Miriam Felton, Shawlscapes with Stephen West, Sizing Knitwear Patterns with Faina Goberstein, and Knit Lab: Fit Your Knits with Stephanie Japel.  I have thoroughly enjoyed them all.

So, when Craftsy offered me this chance to host a giveaway, I was thrilled to be able to offer you, my fabulous readers, such a nice gift.  Good luck to everyone!  I wish you could all win.

Craftsy class giveaway March 2014 from aknitica.com.  Win Knit Lab!  Click to enter.


Giveaway and Knitalong: Celebrating the Under 100 Knit Collection and My Scrunchy Ombre Arm Warmers

Knit along with Ombre Arm Warmers and win a copy of the Under 100 Knit Collection!


[box type=”info”]Read on for a contest and a chance to win a copy of the book![/box]

Oh, I am so excited!  I’ve been waiting to tell you about these for what seems like forever.  Yes, it’s my first “published” pattern, the Scrunchy Ombre Arm Warmers.

The book it’s in is called Under 100 Knit Collection, and it’s available as an ebook on the Knit Picks website, and as a print book there as well.

[box type=”tick”]You can also buy the pattern all on its own, by clicking here to get to its Ravelry page.[/box]

Knit Picks had the brilliant idea of publishing a collection of quick-knit projects that can use up stash yarn.  Every pattern in it takes less than 100 grams, and mine takes only about 30-35 grams total.

You can even use those teeny, tiny, looks-too-small-to-be-part-of-anything balls of sock yarn in these arm warmers.  Trust me.  I’ve been experimenting.

Now, I don’t know about you, but I have a weakness for arm warmers.  I love having warm hands, but I don’t love having my fingers covered when I want to knit or drive or type.

I think they’re great for wearing under long sleeves for a little extra warmth or for wearing with short sleeves to make my favourite t-shirts last a little bit longer in the fall.

Plus, they’re so wonderfully simple to knit — especially these ones.  All the detail here comes from the fantastic colourways; the structure itself is quite basic.

51175220_5

Once I began playing with the colours, I realized there were so many possibilities.

I love the Ombre striping you’ll see on the Knit Picks sample.  Overlapping similar hues of different tints from light to dark (or vice versa) creates a lovely effect.  (And I’m very curious to try such a thing with a grey or black background as a variation.)

Scrunchy Ombre Arm Warmers by Amanda Schwabe

My favourite so far, though, has to be these ones that I made up from my own stash of Knit Picks Palette.  I’ve listed the colours I used at the end of this post.  

But, I really want to see what you will come up with.  What amazing, flashy, subdued, classic, or crazy colour combination will your stash make?

In order to find out, I’m throwing a party.  It’s a knitting party, and there will be friendly conversation, laughter (I hope), and prizes.

It’ll be very easy to attend, and there’s no particular dress code.  Simply show up on Ravelry in the Aknitica Designs group, or on Facebook at the Aknitica Designs page, anytime you want, starting today, December 30th, until Friday, January 31st.

Show us your arm warmers — before, during, and after — and you’ll be entered to win a prize!

I have one ebook version of the book, the Under 100 Knit Collection, to give away, and one print version.

The ebook will be given away with a random draw this Friday!  Just post a photo of the yarn you’re thinking of using in the Ravelry group, and you’ll automatically be entered to win it.  I’ll post the winner in the same thread, then the lucky recipient will get the ebook as soon as I get her/his email address.

Head on over to the Ravelry thread to see about winning the print copy.  And show us your yarn!

Scrunchy Ombre Arm Warmers by Amanda SchwabeColours used in my rainbow sample, in order from cuff to fingers:

Knit Picks Pallete yarn in Turmeric, Pimento, Fairy Tale, Garnet Heather, Currant, Urchin, Bittersweet Heather, Sky, Turmeric (again), Edamame, Whirlpool.

The purple colours are:

Knit Picks Palette Yarn in Fairy Tale, Bittersweet Heather, Eggplant, Urchin, Pennyroyal, Fairy Tale.

Scrunchy Ombre Arm Warmers by Amanda Schwabe

These simple ones are knit in Knit Picks Palette in Midnight Heather and Clarity, with Masala as the orange accents.

So, what yarn will you knit them in?  I look forward to chatting with you in the Aknitica Designs Ravelry group!

And, if you have a moment and would like to share this post on Pinterest, Facebook, or Twitter, I’d appreciate it!

Scrunchy Ombre Arm Warmers