Impunity

When I was a kid, I remember reading a short story called “Impunity Jane.” I don’t know why I always returned to that story; maybe it was because I was a typical girl who loved dolls, and Impunity Jane just happened to be a doll. But really, I think it was the word impunity that had me so fascinated. I just couldn’t infer its meaning from the story’s content. It was a word mystery, and I was hooked.

The mystery remained unsolved, and, eventually, forgotten, until my high school English class. There, in my vocabulary book, was the word impunity! And the definition? Freedom from punishment. The perfect word, waiting to be used in the perfect situation. I love those types of words.

As I was typing up the description for this hat pattern, I realized that the thing I like so much about it is its use of variegated and tonal yarns. I have a love/hate relationship with those yarns, which you may have read about here. They always look so pretty in the balls, and so horribly blotchy in stockinette. Unless.

Unless you can come up with some interesting stitch pattern. Then, they shine. Then, you can knit them up with impunity.

For example, in my new pattern, which I named… Impunity. Shocking, I know.

As you can see, these hats have vertical ribbing to break up the colour changes. And the shaping continues right up to the top of the hat. Lots of springy, stretchy rings and visual interest. This hat looks great knit in any colour, for anyone. I’ve been making them for the gezillions of babies being born to all my friends this summer, and I plan to make one for myself, too. And possibly for my husband. If he’s good. After all, what’s the use in being a knitter if you don’t have an over abundance of hats?

The pattern contains sizing for Preemies, Babies, Toddlers, and Children/Adults. Because of the larger-than-normal needle size and the vertical ribs, these hats are stretchy and will fit between sizes. If in doubt, knit a size up. For instance, Preemie is definitely too little for a newborn of average size, but the Baby size will fit a newborn for quite a while. The size shown in the pictures is Toddler, and it fits the pretty little 20-month-old (if I do say so myself) as well as her 5-year-old brothers. But if you’re knitting for an 8 year old or older, I’d go with a Child/Adult size. Clear as mud?

You’ll need a 50g ball of fingering-weight yarn and size 3 US (2.75mm) needles for working in the round. I used two circular needles, but dpn’s or magic loop would work, as well. The yarn I used, that’s shown here, is one of my new favourites: Shibui Sock. Oh, the springiness! Oh, the colours! My hands are happy when I knit with it. The colour shown here is called Roppongi, and it’s a pink/orange mix. Bliss!

[box type=”download”]download now for free![/box]

Stars in His Squishy Owl Eyes (And tips on stuffing your Owl)

I rather love my little Squish Owls. They’re small and fun to make, and, of course, extremely squishable.

I recently knit up this little guy using some cotton yarn from Knit Picks (a combo of “Comfy” and “Shine Worsted,” I think, since I have both in a bunch of colours), and I think he’s very handsome. He’s made to match a baby boy’s room, but the baby boy is taking his time arriving! The little rascal’s due date was yesterday, but as of last night, he seemed to be in no hurry to arrive.

Here are a couple more pics of this owl, followed by some tips on stuffing your own Squish Owl.

How to stuff your Squish Owl:
Think “cylinder.” I know it’s tempting to make them really round and fat, and if you really want to, you can. But I like mine to look tall.

First, I shove bits of stuffing right down to the bottom to make a flat base for him to “stand” on.  His bottom has lots of room in it from all those increases we knit in, so be sure to shove lots of stuffing around in that circular base to fluff him up and give him some support.

I add it in loose, peach-sized amounts at first, building the owl from the bottom, then putting smooth pieces around the outsides, then adding bulk into the middle.  I want to control the shape of the owl.  If one part looks too fat, I remove a little. If it looks too skinny or empty, I add a bit more. But I do that in small increments so as not make him all lumpy.  I also avoid bunching the stuffing up before I put it in, since making it more dense beforehand also makes it more lumpy and takes away my control.  If I keep the stuffing loose, I can control the density after it has been added, therefore avoiding weird lumps.

The goal is to make him nice and cylindrical. Actually, I try to add a little more padding at his sides so he’s more of an oval cylinder.  You want his stitches to look nice and taut, but not overstretched. Keep tweaking the shaping of the stuffing until you are satisfied. You can always shove your fingers in there to rearrange things, or even take stuffing out if it’s misbehaving. His shape isn’t determined until you graft those last stitches together, so be picky.

After the body is the shape I want, I stuff the ear tufts.  I shove a small, loose piece right up into the tips first, poking it with my finger and gradually adding more until the tip is nice and pointy.  Then, I usually have to add a little more stuffing under the tufts and above the body stuffing, just to make sure the tufts will stay puffy.  I poke it around with my finger until the body-to-tuft transition is nice and smooth, adding extra stuffing or taking it away as needed.  Then I fill in the middle of the owl’s head, underneath the spot where I’ll be grafting.

The trickiest part, I think, is that last bit of stuffing before you graft. I’m always inclined to put in too little stuffing at the top because I feel like the stitches are pulled too tight. But if I don’t have enough stuffing, the top of his head will be too empty after grafting (because the grafting basically adds one more row of stitches). So don’t be afraid to add a little extra underneath the grafting spot.

Do you have any tips for us on stuffing your Squish Owl? If so, I’d love to hear them!

And now, I’ll end with just one more photo.  Happy stuffing!

Yarn Obsession

Just call me The Compulsive Yarn Photographer.  That’s me.  Lately, I’ve been taking photos of all my new balls of yarn to store in my Ravelry Stash database.  I feel a little silly, but it kind of makes me happy.

Plus, I just love its squishy self.  Yarn, I mean.

Like this ball, which was sitting on my very messy kitchen table, staring at me.  Smiling at me. I had to capture its cuteness.

It’s such a weird, intense, mustard-y colour that for some reason, I like it. Also, it looks awesome alongside my favourite colour, electric blue. I plan to knit that little beauty up into a cowl for a pop of contrast in my usually-blue wardrobe.

It’s also is made of jade. I got it at a yarn swap last night, and I’m exceedingly pleased with it.

I have this theory about yarn and all things knitty and fibre-y. The theory is that when the apocalypse comes, and we all have to fend for ourselves without electricity and government and iPods and Facebook, knitters and spinners will be heroes. What’s that? we’ll say, You’re cold? Your sweaters are all worn out? Well, do you see that sheep over there? I can make something warm and beautiful with it. I know. I’m awesome.

I have another theory. This theory is that if everyone could just find something they love to do as much as I love to squish and photograph and knit yarn, then the whole world would be quite a stunning and happy place. Personally, I think that everyone should like knitting, but maybe others will prefer things like crocheting or roller derby. Whatever.

So, for the rest of you yarnaholics whom I do not know but love already, here’s a little more eye candy.

Misti Alpaca Lace….. *squeeze*
I have a special fondness for sock yarn.

Have a lovely, yarny day!

Amanda

Play

So I just learned this great new way to work short rows from Cat Bordhi. She taught a class called Cat’s Sweet Tomato Heels a couple weekends ago during a four-day Cat-class-stravaganza hosted by my local knitting guild, and I’m so glad I went.

Cat’s new method of working short rows is phenomenal. There are no wraps, no gaps, and virtually no difference between turns on the knit side and turns on the purl side. Therefore, I have been freed to put short rows everywhere, with no thought to the consequences!

However, you may have noticed that the name of the class was not “Cat’s Short Rows,” but “Cat’s Sweet Tomato Heels.” You are absolutely right! Good observational skills. She has developed a great new heel that will fit on virtually any sock and is so easy to knit that once you learn it, you won’t need to follow directions again. You will be able to just slap in a heel wherever and whenever you feel like it.

These magical heels are made up of short-row wedges. I will let her do the explaining for you, since they are her heel, her Thanks Ma’s, and her idea. She has a great video tutorial here, and her book is equally recommended.

All I did was take her brilliant heel wedges and play with them.  I felt like a kid in a sand box!

But before I can tell you that story, I have to tell you this story:

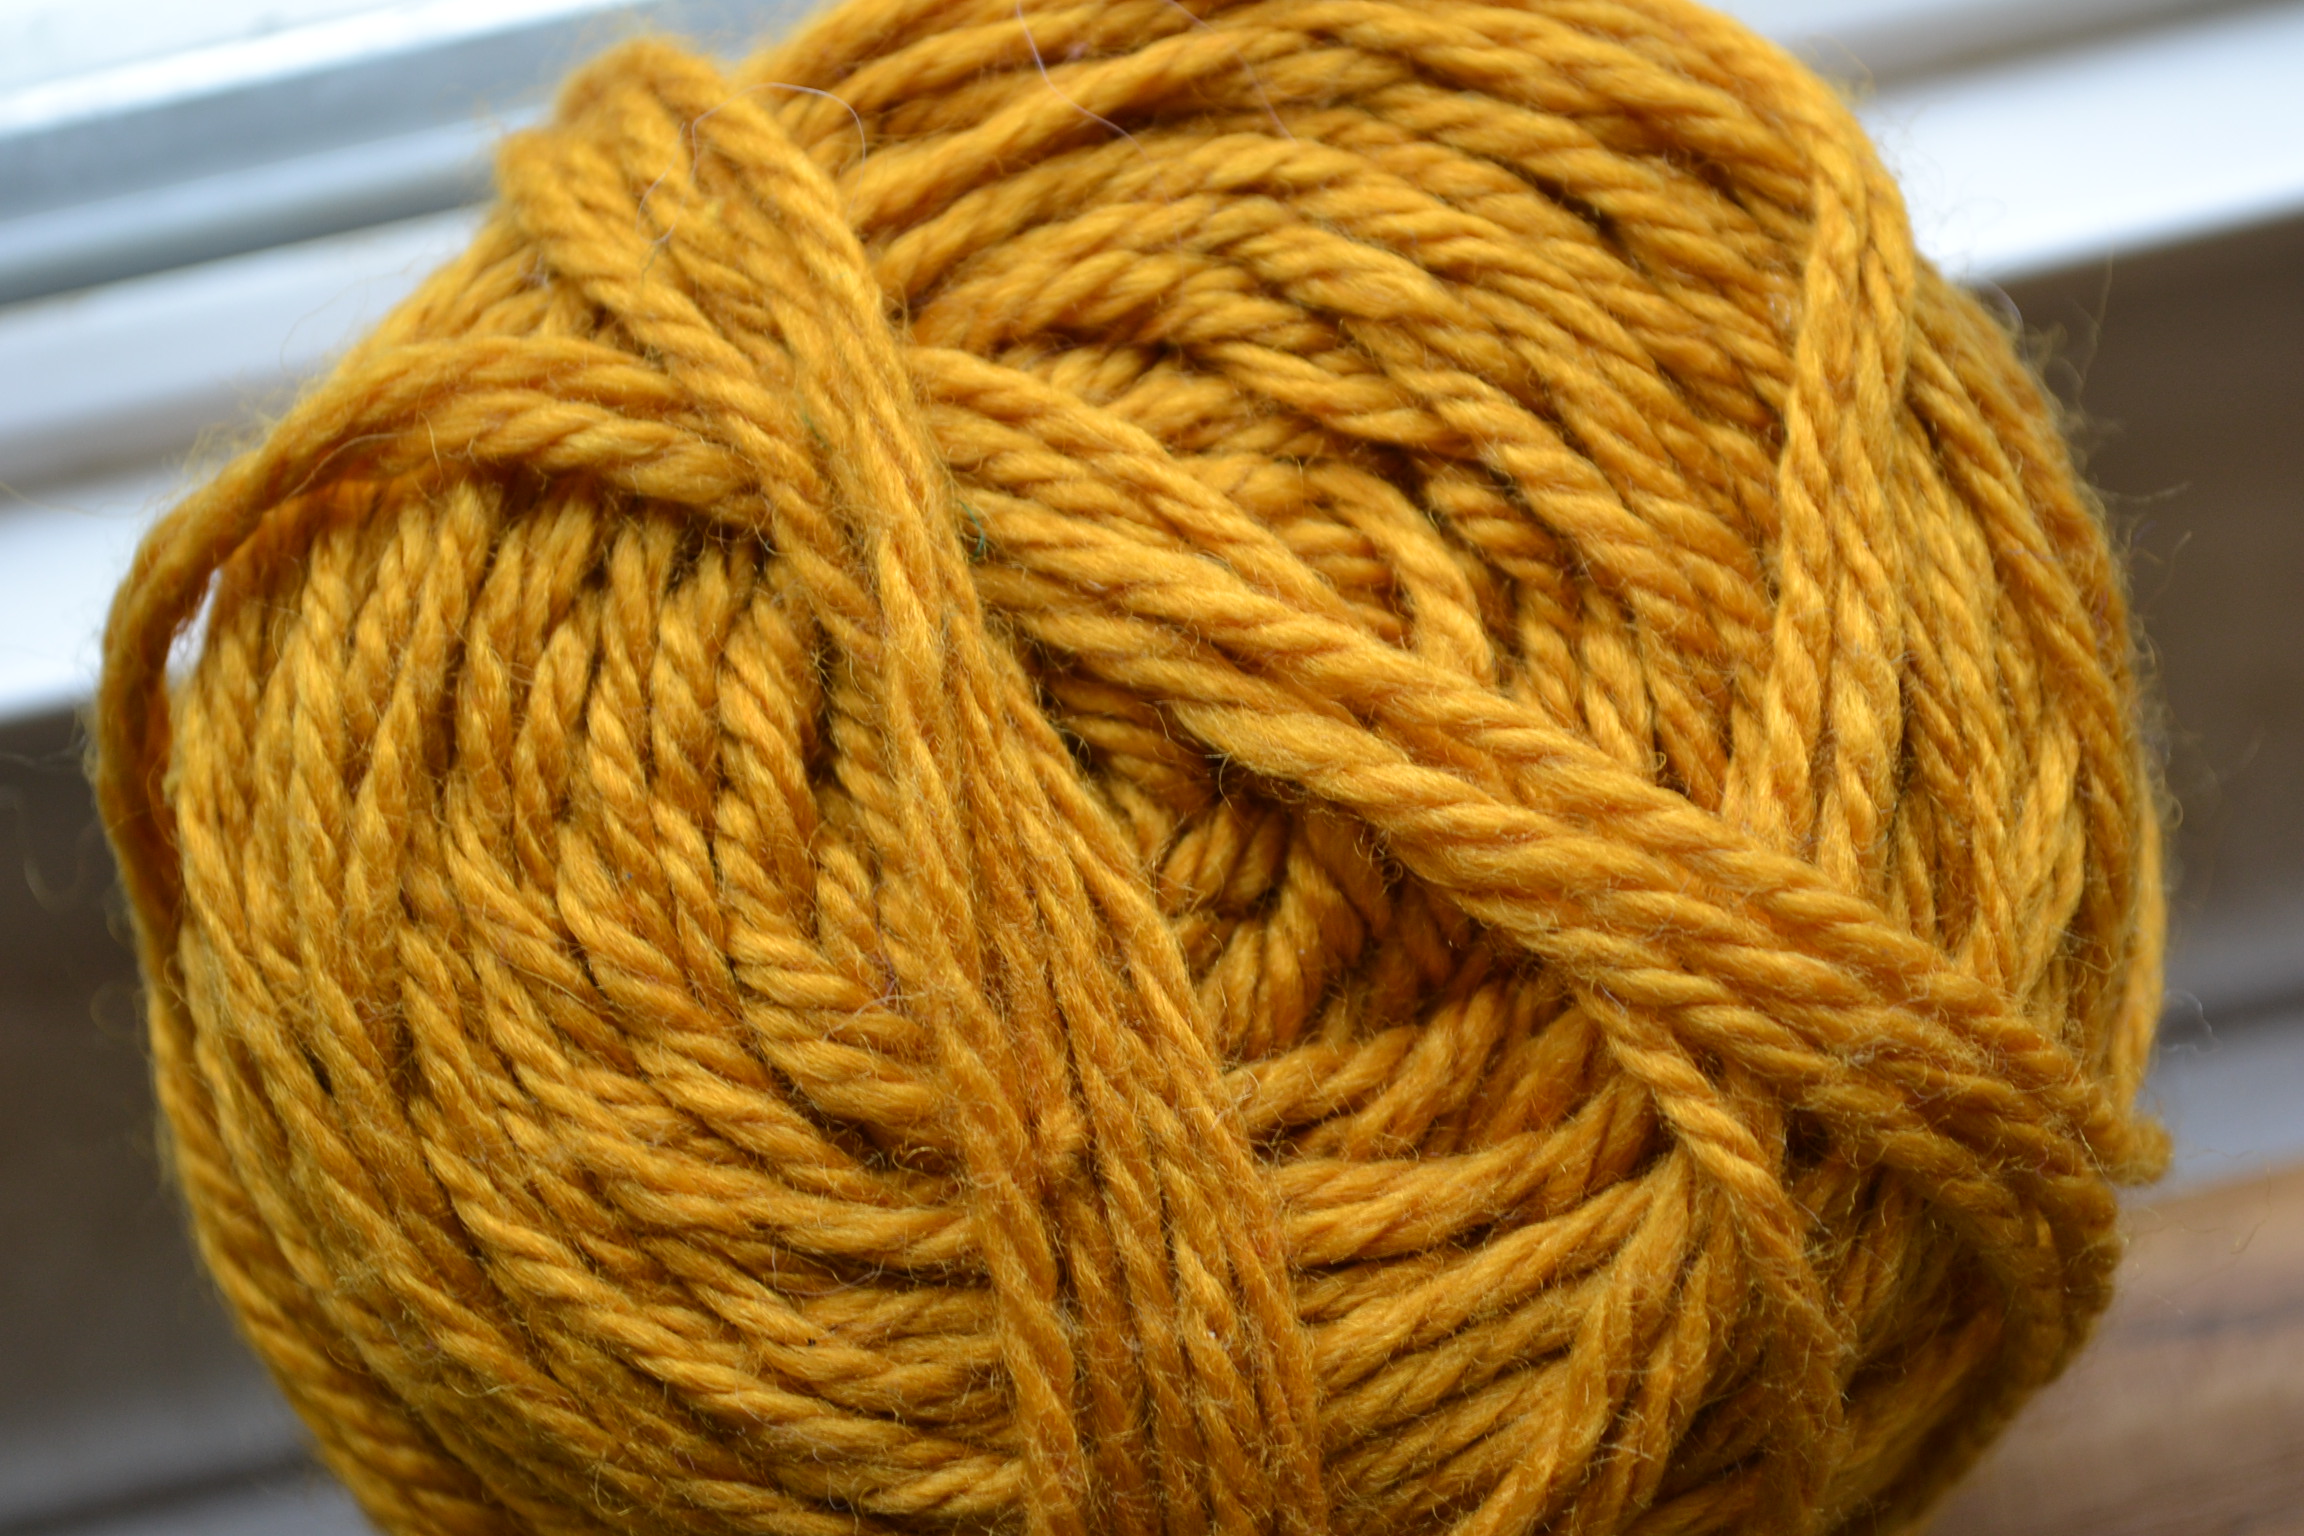
You see, after Cat’s class, my friend Annie and I had to, just had to, go buy some really luscious yarn. Cat’s sample socks felt unlike any socks I’ve ever knitted, and I knew once I felt that yarn that I was missing out. I had to go find some high-quality, bouncy, springy yarn. We made our way over to one of the local yarn shops and spent a good hour or two ooh-ing and ahh-ing over all its delights. I came home with four skeins of luscious yarn: two in superwash merino sock weight, one on-sale silk/wool blend, and some on-sale Blue Faced Leicester Aran, all of it springy and delicious.

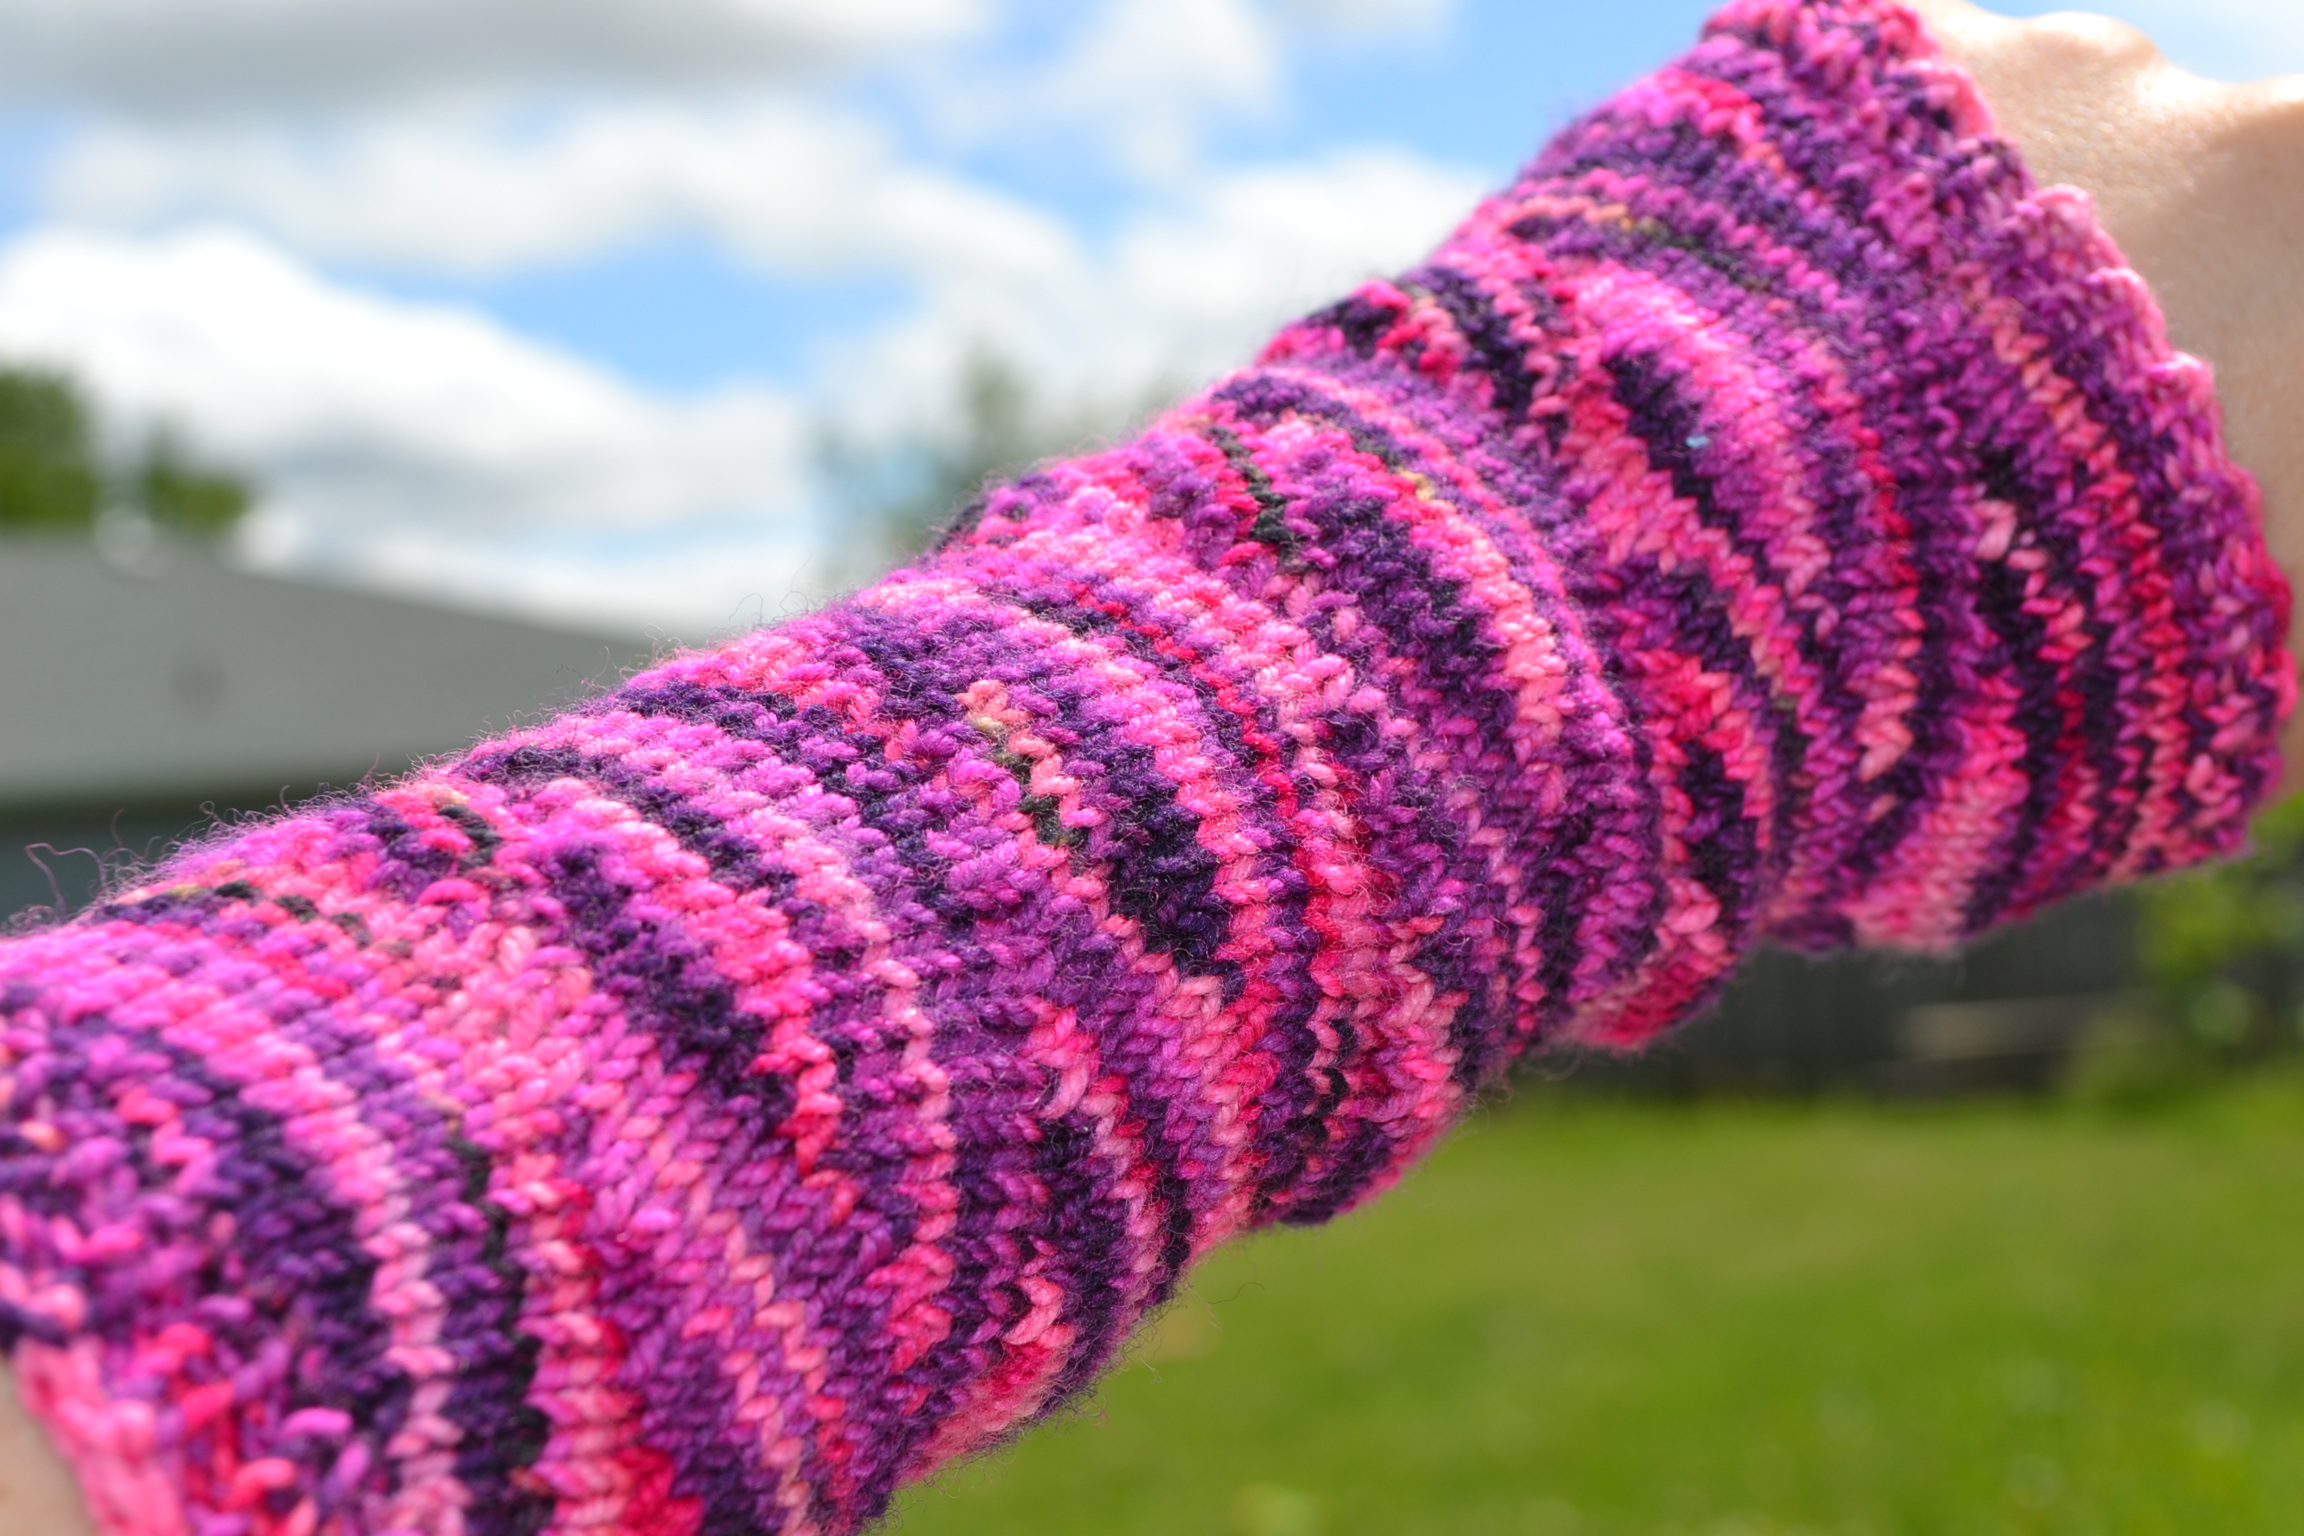
Here is the one I was most excited to knit up: a skein of Colinette Jitterbug in “fruit coulis,” reminiscent of 80’s punk-rockers and dying to be made into arm warmers or wrist bands or leg warmers. I decided to satisfy two cravings at once: I have always wanted to buy Eva some Babylegs, but as a knitter, I can’t bring myself to spend $14 on machine-knit socks with no feet. So, I decide to use the Jitterbug to make her some really amazing arm warmers, which I hoped would also double as leg warmers.

The only problem with hand-painted and variegated yarns, in my mind, is that I fall in love with them in the skein, but then I hate how they knit up! Stockinette always makes them look so blotchy and busy, and I’m invariably disappointed. And even though I loved knitting with this gorgeous yarn, the colours just weren’t working for me. As I sat, dejectedly, at my kitchen table, trying to think of an alternate stitch pattern that wouldn’t ruin the yarn, I heard the voice of one of my fellow knitting-class students bubble up from my memory: “These heel wedges look really great with my hand-painted yarn!”

And then I thought, “What if I could use the wedges in my arm warmers? I could rotate the wedges to form a cylinder.” I remembered taking a class with Lucy Neatby and her explaining that she had made a vest out of four triangles, since four triangles form a cylinder, and I figured that the wedges were somewhat triangular…

So I tried it.

For my first try, I worked the wedges to be a little more pointy than Cat recommends for a sock. In fact, I worked them until there were just 3 sts left between turns. They looked really amazing, but ended up forming tiny mountains that stuck out from the arm warmer. I’m going to file that information away for later because someday, I may want arm warmers (or whatever) that have lots of texture to them. But that wasn’t my goal with this project, so I ripped it out.

It turned out that working a heel wedge exactly the way Cat instructs, leaving about an inch of stitches between the last turns, gave exactly the effect I was going for.

(The bottom photo, above, shows what the wedges look like in the direction I knitted them.  The top photo is of me holding it upside down, if you want to call it that.)

Amazingly enough, they will fit Eva as arm warmers and leg warmers, and I can fit them on my wrists! I think that my second try made them just the right size to be long-lasting, wearable garments, since even when she outgrows them, they’ll still fit me.

Here, in a nutshell, are my instructions for making your own cylinders like mine. I’m not going to explain Cat’s method of short rows, since like I said, they’re hers. Also, she is an excellent teacher, and she’ll do a much better job than I could. 🙂 So, these instructions are assuming that you already know and understand the Sweet Tomato Heel wedges.

I used fingering-weight yarn and size 1 US (2.25mm) needles. My preferred method for working in the round is to use two circular needles, but you can easily use dpn’s or magic loop. My gauge with those needles and that yarn is about 8sts/inch in stocking stitch.   The size I made fits my 19-month-old’s arms loosely, with room to grow but without falling off right now, and stretches comfortably to fit my adult wrist.

I cast on 48 sts using Jeny’s Stretchy Slip Knot Cast On because I wanted both ends of the arm warmer to be super stretchy. It was a new-to-me technique, and I found it a little tricky at first, but the tip she gives in the end of her video fixed the problem I was having. I highly recommend you try it out! Otherwise, cast on using whatever stretchy cast on you know and are comfortable with.

Join for working in the round. Work in 1×1 ribbing for about 4 or 5 rounds.

Knit one round, then begin first wedge. Unlike while you’re working a heel wedge, work over only half the total stitches; in this case, 24. (A heel wedge is worked over two thirds of the stitches.)

After your first wedge is completed, work a wedge on the opposite half of the cylinder in the same manner. This will give you two wedges, one on each circ. Now, you might notice that you have two hollow spots left between the two hills, and your arm warmer is no longer an even cylinder. The next two wedges (wedges 3 & 4) will fill in those hollows. After completing the second wedge, perform a mental shift. Basically, in your last round of that second wedge, after you Thank Ma up the hill, you knit back down the hill and then up the next hill only halfway (12 sts, half the stitches on that circ). Then, you turn your work and start the 3rd wedge in the valley.

Work the 4th wedge in the other valley, then do another quarter rotation and start again from the beginning.

You work in repeats of those four wedges until your arm warmer is as long as you want it to be. Then, work in 1×1 ribbing for almost an inch. Cast off using Jeny’s Surprisingly Stretchy Bind Off, or whatever other super-stretchy bind off you know and like.

Don’t be afraid to play around with the rotation. You don’t have to do things exactly the way I did to get a good result, since knitting is so stretchy and resilient. I had a lot of fun just playing around to see if my experiment would work, and I was thrilled when it did!

I am also imagining using this rotating-wedge method to make really amazing socks. They would, of course, feature a Sweet Tomato Heel. 🙂 I see another trip to my LYS in the near future to get some more hand-painted yarn!

I also wonder what it would look like to rotate wedges that weren’t made over 50% of the circumference, but over 60 or 70 percent instead. Wouldn’t it be fun to find out? And what if the wedges were more narrow…..  ??

I will end now with a few more pictures:

Please show me pictures if you experiment with rotating wedges. I’d love to see them, as I’m sure Cat Bordhi would, too. In fact, I showed her these ones before I posted about them here, since they’re based pretty heavily on her design.   She has a Ravelry group you can join that is dedicated to her Sweet Tomato Heels, and I’m going to head over there now and share some of these pics!  Maybe I’ll see you there.  🙂

If you have any questions about the rotation, feel free to ask! If my written instructions are confusing, let me know, and I’ll work to clarify them and add some more pictures of the process when I can.


Cat Bordhi developed her Sweet Tomato Heel over many months, working closely with over a hundred test knitters of all skill levels. During this time she distilled her illustrations and explanations again and again, until her test knitters and tech editor agreed the instructions were as clear and perfect as possible. In order to be sure that her work is not misrepresented, Cat asks that designers who wish to use her heel in their patterns send their readers directly to her free videos as well as to purchasing links for her eBook, Cat’s Sweet Tomato Heel Socks ($20), and to the eBook’s individual patterns ($6 each). She is encouraged that many knitters have been able to work from the free videos alone; if not, the eBook or individual patterns will give you the detailed instructions, illustrations, and explanations you need.

Tiny Pleasures

My favourite part of homeschooling are the tiny moments of learning and wonder that pop up unexpectedly, like finding an inch worm in the back yard.

This one even had the good manners to show up on a day when he matched the yarn on my needles.

Getting the camera out to snap photos of this little green guy inspired me to finally catch up on some knitting photography.

Here’s a little vest I knit up for a friend’s soon-to-be-born baby. I was aiming for a 6-month-old size so it would fit him in the fall (because who would dress a baby in a sweater vest in hot, humid July?), but I’m afraid that I miscalculated and made it too small. This vest will be put in the “mystery recipient” pile and saved for a gifty emergency.

I decided to get serious with my second try, so I found an actual vest pattern the second time around and just modified it to suit my preferences. I wanted to knit most of it in the round, you see. It’s so much easier to do stripes that way. As it was, there were still more ends to sew in than I liked. But I pulled up my big-girl panties and just did it. I also learned a new cast-off technique just in time to make the neck edge super stretchy. That little opening can stretch out to fit two babies inside, if I so desire. I don’t, but it makes me happy to know I could.

I also took some random, vague knitty photos for those frustrating occasions when I need a photo, but don’t have one. You never know when generic knitting photos might come in handy. 😉

My two favourite pleasures: yarn and coffee.

Happy knitting!

Meeting Cat Bordhi

I must admit, I was so nervous the morning I woke up to go to my first Cat Bordhi class.  I had already read her book New Pathways for Sock Knitters cover to cover; in fact, that was the book I picked up when I wanted to learn how to knit socks for the first time.  (And if you know me, you might suspect that I didn’t just want a book full of patterns; I wanted a book that would explain the different parts of a sock to me — one that would allow me to understand their construction so I could make them up on my own.  New Pathways was that book for me.)

You see, I became a better knitter from reading New Pathways.  Cat didn’t just write a book full of sock patterns.  She wrote a book full of knitting tips disguised as a sock-knitting book.

Would the real Cat Bordhi, I wondered that morning, be nice?  Would she like me?  I want to be a designer like her someday… Would she see anything special in me, or would I be just another student?  

Well, I don’t know how she saw me, but I sure enjoyed meeting her.  She seems to be a teacher to the core, and a good one, at that.  I believe that she really gets excited by encouraging other people.  She wants her students to excel.  She wanted us to come up with new ideas that we could turn into our own patterns, and she cheered us on through the whole process.

In short, I had a great time.  

And now, the top ten things I learned from Cat Bordhi, in no particular order:

  1. Persevere; new ideas come from the strangest of places;
  2. Play with the yarn;
  3. Use other brilliant people’s awesome techniques, and give them full credit (think Judy’s Magic Cast On and Jeny’s Surprisingly Stretchy Bind Off and Cat’s two-circ method for knitting in the round);
  4. Do good work;
  5. Come at problems from new angles to find solutions;
  6. Knitting can always get better;
  7. Any technique can be tweaked, especially if you’re determined;
  8. Knitting builds community; LYS’s are an important part of that;
  9. Good yarn is worth the money;
  10. Knitting will always be fun.  (I already knew this last one, but I love seeing it in other people, too.  It makes me happy.)


I Took a Class with Cat Bordhi and…

What a great weekend I just had!  (Okay, it was two weekends ago now.  I wrote this post last week, but wanted to “tweak” it… Thanks to this post by Crunchy Betty, I have more confidence in posting today.)

Anyway, I took two classes with Cat Bordhi, organized by my local knitting guild.  The first:  Cat’s Sweet Tomato Heel.  The second: Finding the Fountain of Fresh Knitting Ideas.

Oh my!  And what a fountain.  Whether or not some of our crazy brainstorming results in some new patterns from me is yet to be seen. My brainstorming partner and I got pretty carried away, and the things we came up with are much more complex than any of my other patterns to date.  But I might be up for the challenge…

I have some other things to think over, too.  I think it was Sally Mellville who mentioned, in passing, during our guild meeting, about a woman who taught pregnant women on bed rest to knit.  Cat’s topic at the meeting (since she was our main speaker — Sally just happened to have some extra input for us during the discussion time) was twofold:  the relaxing attributes of knitting, and the importance of supporting local yarn shops.  Imagine the therapeutic potential of knitting while going through tough times!  We all know it works; it’s why we do what we do.  (As for the LYS topic, we can talk more about that later maybe.)

The idea of teaching people stuck in hospitals to knit has caught my attention.  I have a soft spot for hospital families, since ours was one for a while, and one of my best friends’ is one right now.  I wonder if the moms of kids in the local childrens’ hospital would like to learn to knit.  I wonder if the teenage patients would like to learn to knit.  I wonder if the little kids would like to learn to knit.

I sat with my kids this morning, taking turns with each one on my lap, teaching them to finger knit.  Again, I was inspired by Cat last night, who talked about her classes of middle school students knitting while she taught them; she talked about how it calmed them and helped them focus; how it broke down social tiers; how it gave the kids with less-obvious skills something to excel at.  The more I thought on the calming and focusing aspects of knitting, the more I wanted to teach my kids to knit; and my motives are no longer as selfish, wanting them to knit just because I think it’s awesome and therefore everyone should do it.

As I sat with my second-youngest on my lap — the one who is slightly behind, the one who I worry about the most when I choose to worry — I felt tears of amazement gather behind my eyes.  He and I sat, with fingers overlapping, chanting “in front, behind, in front, behind,” then repeating “up and over, up and over, up and over.”  He loved the rhythm of it all, the repetition, the growth of the “snake” down the back of his hand.  His little fingers, awkward at first, became adept at pulling the loops up and over his finger tips.  Then he, in the two minutes I turned away to help another son, wound the yarn around his own fingers, whispering “in front, behind, in front, behind” to himself.  He did it perfectly.

There really is something wonderful about knitting, isn’t there?

More on my inspirations from Cat in later posts…  Her Sweet Tomato Heel is really something wonderful.  You can find the how-to video here.

Have you taught kids to knit?  How did it go?  I’d love to hear from you.

From Scratch

In a world of knitting, I still have to eat.  (Don’t you ever just get so annoyed that you have to stop the stitches in order to make the food?  What a nuisance.  That’s why I like making bread.  I can knit while it rises.)

The thing about us knitters is that, well, we like to make things from scratch that can easily be bought in a store.  Socks?  I’d rather spend $20 on a ball of luscious yarn and take a week to make them, thankyouverymuch.  Sweaters?  I can totally make a nicer one than that cabled one in the store that’s on sale for $10.  

Sourdough bread?  I think I’ll grow my own wild yeast and wait a week for it to get all bubbly… at least once in my life, anyway.  Kind of like my vague goal of someday knitting my own lace curtains, from my own pattern.  

It turns out that sourdough starter is much easier to make than lace curtains, though.  I pulled out my trusty, clunky copy of The Joy of Cooking (much like the newly re-released Principles of Knitting that’s the biggest reference book on knitting I’ve ever seen, TJoC is a huge, fat book full of everything I could ever think to do in a kitchen, including make three different kinds of sourdough starter).  I chose the simple one: mix 1/2 cup of flour with 1/4 cup of lukewarm water, then let it colonize itself from the wild yeasts in the air.  

Is that not the coolest things you’ve ever heard?  I mean really:  wild yeast?  Who knew!?

I’ve been feeding my little blob every day, twice a day, for about 4 or 5 days now.  At first, it just sat there, looking all doughy and cute.  But each time I fed it the same, boring meal (1/2 cup flour, 1/4 cup water), it changed a little.  It got looser, and fatter, and it started to bubble.  And now, it looks like this:

Image

I think it has enough leavening power in there to make some bread soon!  I’m pretty excited.  I’ve been feeding it and loving it, and soon I will be eating it.  I think I will name it Jennifer and keep it forever.  In small pieces, at least.  It’s big enough now that I could easily take 2 cups out and still have more left to feed and love.  Maybe I should knit it a sweater and a little matching hat, just to show my appreciation for its bubbly-ness.  What exactly does sourdough like to wear?  Fair isle?  Or simple garter stitch?

Squish Owls

Barn owls? Screech owls? No… Squish Owls!

On a whim one day, I decided to knit my daughter an owl. Because you see, every day when she wakes up from her nap, she points at the colourful decals of owls on her bedroom wall and yells, “Oww! Oww!” repeatedly. I say, if something is good enough to be yelled about, it is high time to convert it to knitting.

I started with this one:

And I enjoyed knitting it so much that I started dreaming about making more, but with little “sweaters” around their bellies. My sister, ever the source of good ideas, suggested not just a sweater, but an argyle vest. I like to keep things simple, and argyle is not in my “simple” mental category. (Maybe in my “Oh Gosh! I’ll have to try that someday just because it’s there, but I’m not sure I really want to” category.) So, here is The Fake Argyle Sweater Vest Owl:

I’m also a sucker for Fair Isle. What could be more Fair Isle (and more simple) than X’s and O’s?

And since I was knitting for my little girl, I felt the need to try out some hearts. ♥♥♥

My next urge was to knit a Charlie-Brown-esque Owlie with a zig zag stripe, but it was at that point that I realized I was running out of colours. Blurg. The good news is that I included the chart for a zig zag in the pattern, so you can fulfil my longing for me. And I have hope that someday soon, I’ll be able to replenish my basket o’ colours. (I desperately need to after knitting up all those colourful hats for my kiddos.)

I have visions of these little Squish Owls becoming not just squeezy toys, but possibly a mobile of some sort. I can just picture it now: little owls pinned to the ceiling, flying on their stout little wings and enjoying the breeze of naptime dreams.

It will certainly keep them from becoming mauled to death.

The pattern for the Squish Owls includes
~ pictures! Lots of pictures! Instructional pictures!
~ the techniques I used to sew & attach the Owlies’ parts
~ a glossary. Exciting, I know.
~ four charts: Tiny Hearts, Tiny Diamonds (AKA The Fake Argyle Sweater), X’s and O’s, and Zig Zag. I used Tricksy Knitter’s chart-making tool to create them.
Click here for tips on stuffing your Owls.

Did I mention these little Owls are only 4.5 inches tall? And that they can fly? (Kids’ fire power not included.)

This pattern costs $5 CAD.

Super Mario Charts

Feel free to use these two charts in any of your knitting projects! I had some fun making them up. 🙂 I have no idea what the copyright is for any of the Super Mario characters, so obviously these are free, and I imagine you should only use them in your own work and not sell anything made with them. And feel free to play around with the colours. I made these charts using www.tricksyknitter.com, and I think I’m really going to like that site for making more charts in the future. It was so so easy.

Anyway, here they are:

Yoshi:

And this is what it looks like in a hat:

I used duplicate stitch to do the small details instead of carrying the yarn. And for the eyes, I actually made a small decorative knot instead. You might also notice that these particular Yoshis also have tongues… They were added on as an afterthought at the insistence of my son, even though these Yoshis are NOT in their tongue-out position. I cringed sewing them on, but he was happy. They’re just a straight, basted line of red, with a little duplicate-stitch bit of red at the end.

Super Mario Bony Turtle:

And here’s what that looks like on a hat:

These hats are knit using a variation of Kate Oates’ Cheery Scrap Cap pattern. I used dk-weight yarn instead of worsted, with size 5 US needles, and I probably played around with the number of repeats, too. 🙂