Posted on

Spring BOGO, New Mitten Patterns, and I Yarn Bombed A Horse. I Really Did.

I’ve been busy this winter but unable to tell you about it! Let me catch you up.

I’ve been making videos. My favourite so far is this one on how to pick up stitches for no-gap thumbs. I keep reading how it’s impossible, but it so isn’t. In the video, I show you exactly how and where to pick up your stitches to close the gaps without any weird twisting. The best part is, this method just makes it look like columns of knit stitches with nothing out of place. I’m pretty pleased with it.

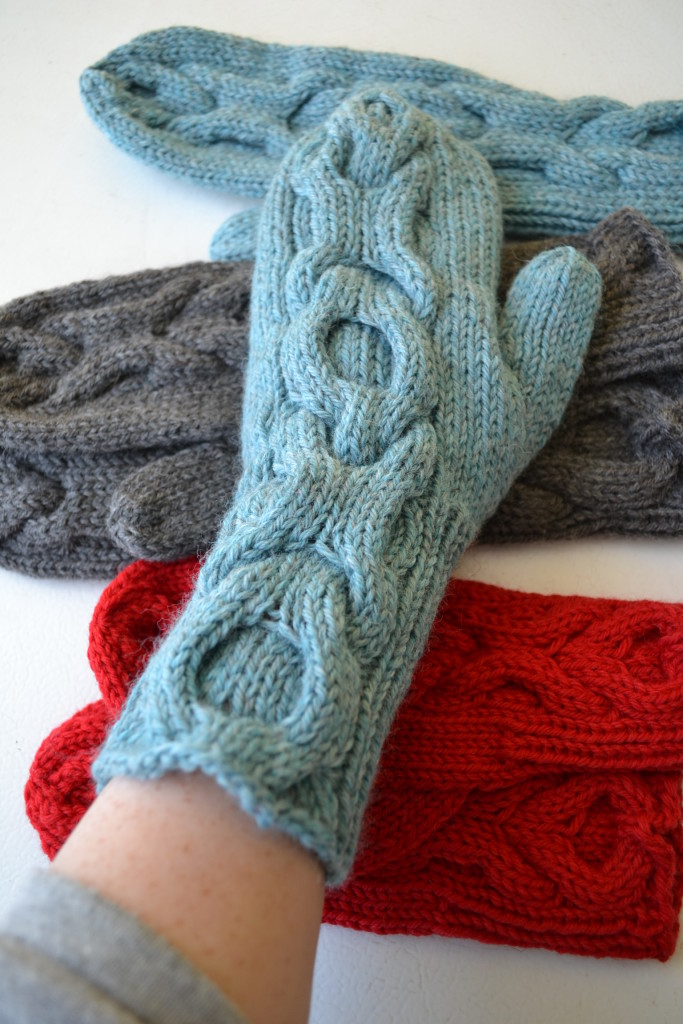
Aaaand, that cabled mitten in the video? It’s my new pattern, just new out today. I named it XOX OXO. You know how when you write a letter to Santa, his postal code is HOH OHO? (At least it is here in Canada.) Well, the cables and the season made me think of how every time I wear these sweet, squishy mittens, it’s almost like I’m sending myself a message to be kind to myself. I’m a sentimental soul, and I have stupid Seasonal Affective Disorder, so basically I fight against depression every winter. A big part of that battle is recognizing which thoughts are mine and which are symptoms. Hint: if it’s soul-crushingly mean, it’s from a lack of dopamine.

#XOXOXOmittens @aknitica

#XOXOXOMittens @aknitica

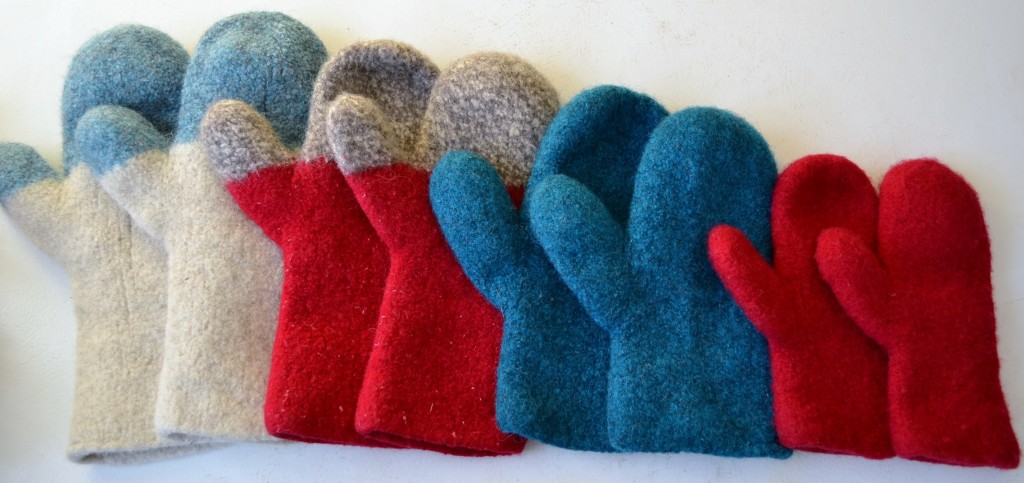
Next on the list of winter-killed-my-brain-so-now-I’m-catching-up is this pattern, Fluffa. These are lightning-fast, super warm felted mittens. They’re knit up with bulky 100% wool on giant needles then shrunk into oblivion in the washing machine until they’re dense and snow proof. These are the mittens you put on your kids for hours-long outdoor snow play. My kids have been wearing theirs all winter, and people, let me tell you: finally, I’ve made hand-knit mittens that actually do the trick! Even when the snow cakes on the outsides of them, their hands are still warm inside. I made some for myself and my husband, as well, and we love them for shoveling the driveway.

#FluffaMittens #felted @aknitica

They’re available in sizes for the entire family, with choices of everyday cuffs or long cuffs for serious outside time. You can even make the larger sizes into oven mitts, since wool is fire and heat resistant. Neat, eh?

They go nicely into the dryer, too, for those days when your kids want to go outside again before the mittens have dried on the air vents.

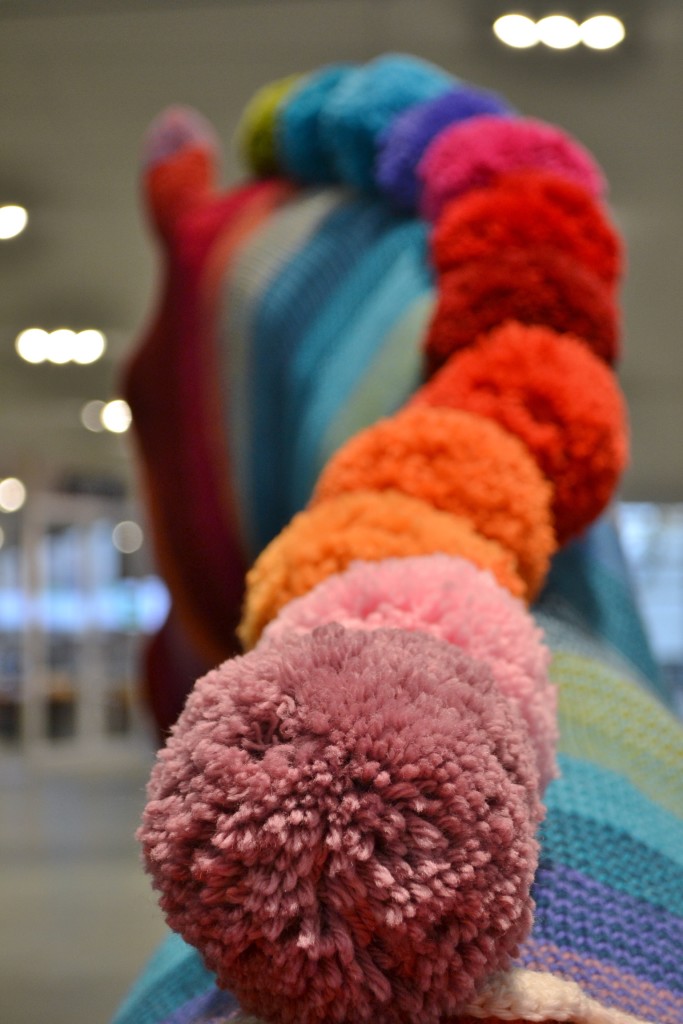
Another thing I did, which I’m pretty proud of, is I knit a horse. Yes, I got to yarn bomb a horse statue! It’s been on display at the Canadian War Museum in Ottawa, in conjunction with their World War Women exhibit and a big knitted-goods donation drive they hosted.

#PompomTheHorse #yarnbomb @aknitica #CanadianWarMuseum

It was a totally cool project. I had to take all the measurements and design and knit the whole thing myself. My life was insane last fall when I had to make it, and there were a couple delays, so I had three weeks — yes, you read that right: 3 weeks — in which to do the knitting. With the strategy of eat, sleep, knit, and with my husband home to take care of absolutely everything to do with the kids and the house, I did it. Almost. I had to ask Lisa, a knitter friend of mine, to help me out by knitting the two front legs during the last week. And my mom spent a day at my place making all those pompoms.

#PompomTheHorse #yarnbomb #CanadianWarMuseum @aknitica 2015-12-06 001 2015-11-29 087

#PompomTheHorse #yarnbomb Getting fitted. @aknitica #CanadianWarMuseum

I’d love to write a more detailed post about how on earth one designs a fitted cover for a horse. Maybe later, now that my brain seems to have switched back on again, I will.

Lastly, I’ve discovered the joys of Instagram. It is my place, people. Pictures! Pretty pictures! And none of the drama of Facebook or Twitter. I’ve been posting there a lot, sharing pictures of my personal knitting projects, the many gezillions of things that I have on  my needles. (At last count, I had about 20 projects on the go. Yes, I’m one of those knitters.) If you’re on Instagram, come find me! I’m @aknitica. (And feel free to tag me if you’re knitting up one of my patterns! And you can hashtag the pattern name, too, if you like.)

Okay, now really lastly (apparently I was just kidding in the previous paragraph), I’m having a sale! It’s time for me to give all my lovely subscribers a deal. So, how about a BOGO! That’s Buy One, Get One FREE. For a limited time, and on Ravelry only, all of my self-published patterns will be part of this event, including those two new ones above, XOX OXO and Fluffa. Sadly, anything currently published by Knit Picks will not be included. But everything else is fair game. Simply add two (or multiples of two) patterns to your Ravelry cart, and the BOGO discount will automatically be applied to all eligible patterns. Yay! Go here to start shopping.

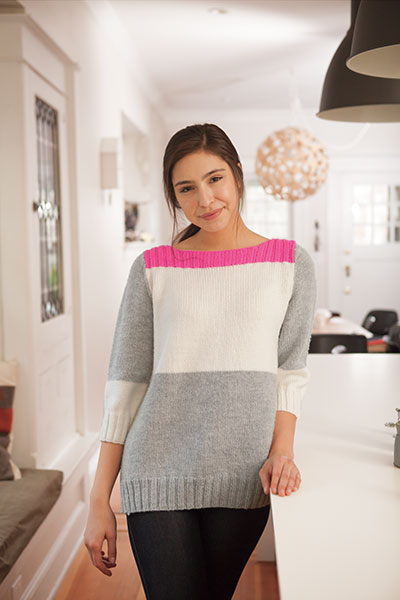
And rats, now I’m reminded that I had one last thing to show you. Too much yet? I just had another pattern published by Knit Picks! It’s Faela, my first sweater design, and it’s part of The Colorblock Collection. There are some gorgeous sweaters in there. This one is an oversized tunic with slight A-line shaping. It’s knit up in soft Knit Picks Swish Worsted.

#Faela Sweater pattern by @aknitica on @knitpicks

And that is really all for today. See you around the internets!

Amanda

Posted on

How You Can Learn to Be the Best Knitter Ever

Okay, maybe that’s a slight exaggeration. 😉 But seriously, I’m teaching knitting classes! And in each one, no matter what the topic, I want my students to learn all the little tips and tricks that have taken my own knitting to the next level. I want them to know that they can knit anything. So far, we’ve been having a ton of fun together.

So what does this have to do with you? Well, if you’re in the Ottawa area and you’d like to hang out with me and learn some really cool stuff, you could join me for a class or two. If you’re not in my area, I’m also toying with the notion of teaching private lessons via Skype or maybe Google Helpouts. My specialty? Fixing mistakes and learning to read your knitting. I am the master of dropping stitches and reconstructing knitting messes. Just ask my students. 😉

I’ll also be posting more tutorials here as I create them for my classes. Upcoming topics will be some of my favourite specialty cast ons, picking up and knitting in various places, and perfect double-knit thumbs. I don’t want to reproduce the basics that are already out there on the internet. I’m going to aim for some more specialized techniques that you may not have heard about yet.

I’m also available to teach workshops and give private lessons. If I still have your interest, here are the classes I have available so far. Some of them are running at Yarn Forward on Bank Street, and I’m happy to teach them in other places, too, if you’re looking for a knitting teacher. I’m constantly developing new courses based on my students’ interests. If you don’t see what you want in this list, ask for a new one!

How to Design a Hat

4 Sunday afternoons: September 7, 14, 21, & 28 from 12:30 – 2:30 pm at Yarn Forward on Bank Street.

Learn basic hat constructions, how to modify them, and how to add your own design elements to them. Hats are a great first designing project. They’re small, simple canvases on which to begin getting comfortable with customizations. We’ll be putting your favourite stitch patterns or colourwork patterns into a hat construction of your choice.

Super Adorable Baby Knitting

6 Sunday afternoons: September 7, 14, 21, 28, October 5, 12 from 3 – 5 pm at Yarn Forward on Bank Street.

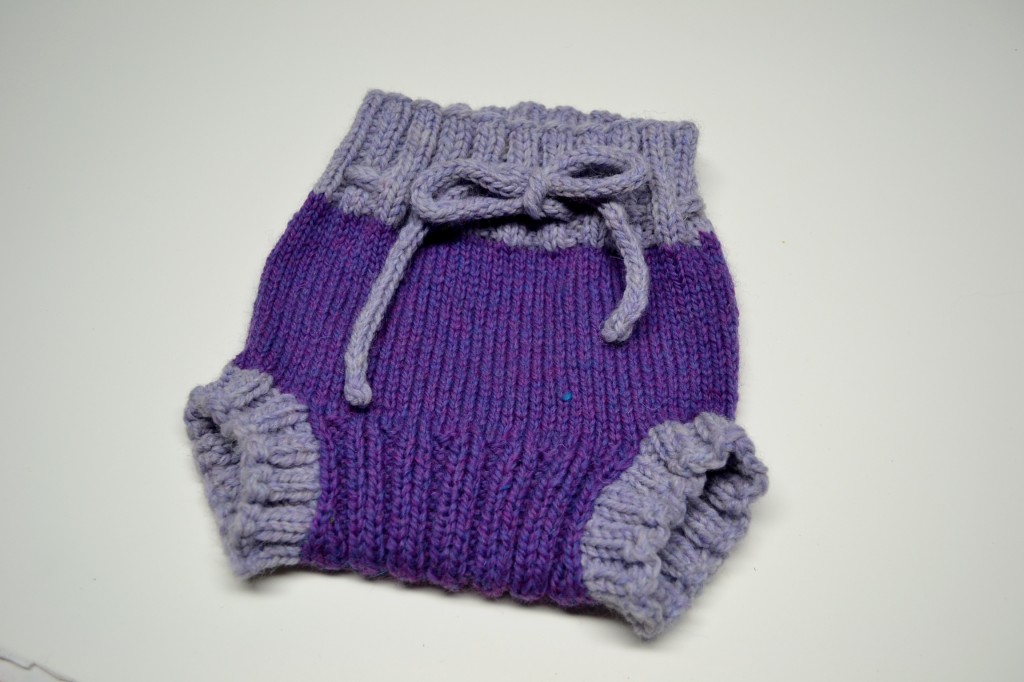
Are you, or do you know, a cloth diaperer?  Well, let’s knit some wool soakers and longies!  As you may know, wool is one of the best fibres for soaking up moisture while still keeping baby warm.  And the wool you can buy nowadays is far from scratchy; in fact, it’s gorgeous.  We’ll talk about the various parts in a wool soaker’s construction and why they’re there.  We’ll knit one (or two… they’re addictive) up for ourselves.  And then, since this is Canada and winter is coming, we’ll knit a pair of wool longies, too.  What better way to keep babies warm and dry in their cribs?  During this class, you’ll learn all sorts of interesting techniques, like my favourite provisional cast on, increasing and decreasing, practically-invisible short rows, a perfect way to sew in ends, Kitchener stitch, and I-cords, to say the least.  Whether you’re a parent, a grandparent, a friend whose friends keeps having babies, or just a person who loves quick, adorable knitting projects that make perfect gifts, this is the class for you.
Baby soaker pattern in the Super Adorable Baby Knitting Class by Amanda Schwabe. www.aknitica.com

Double Knit Hat and Mittens

8 Thursday evenings: September 11, 18, 25, October 2, 9, 16, 23, 30 from 7 – 9 pm at Yarn Forward on Bank Street.
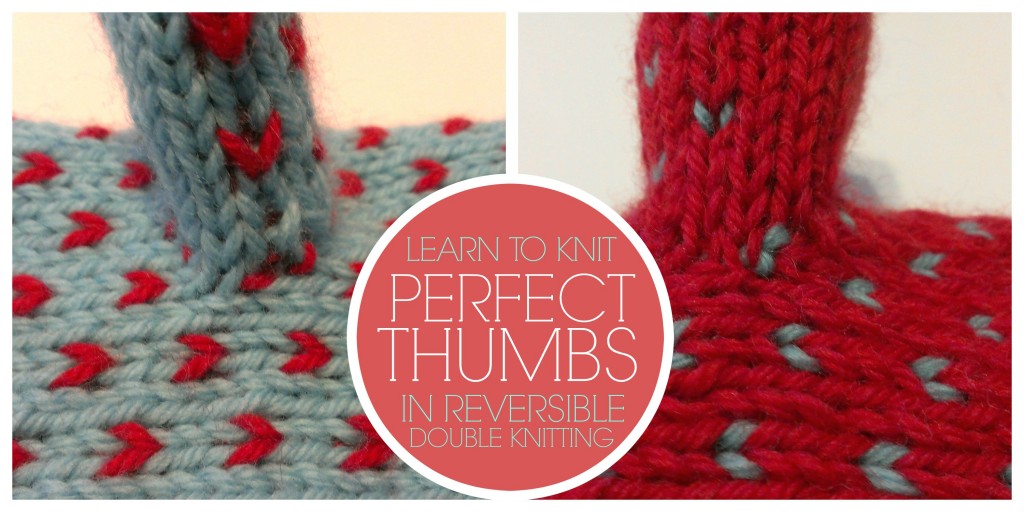
Let’s make the coziest winter set you’ve ever seen: woolen, double-layer hat and mittens.  Wool has incredible properties — absorbing up to 30% of its weight in water while retaining warmth — and the new 100% wools are far from scratchy.  So let’s take advantage of that, and take it to the next level with some double knitting.  We’ll start off with the basics of double knitting in the round, and then we’ll move on to shaping a hat and then some mittens.  They will be reversible!  You’ll have the choice of making one or both sides patterned.  
perfect thumbs in double knitting. a new class with Amanda Schwabe

How to Cable and Knit Mittens

6 Sunday afternoons: October 5, 12, 19, 26, November 2, 9 from 12:30 – 2:30 pm at Yarn Forward on Bank Street. You can book your spot at www.bookeo.com/yarnforward
This class is brought to you by special request.  Would you like to dive into cabling?  Let’s do it together on a small, cozy project: mittens!  Whether you have knit mittens before or this is your first time, this is the class for you!  We’ll take our time and learn all about cabling, and then we’ll knit a cute pair of cabled mitts in the round.  I’ll walk you through the thumb and finger shaping as we go.  At the end, you’ll also receive a bonus matching cabled hat pattern.  What could be better?

Beginner’s Knitting

6 Sunday afternoons: October 26, November 2, 9, 16, 23, 30 from 3 – 5 pm at Yarn Forward on Bank Street. You can book your spot at www.bookeo.com/yarnforward
Is learning to knit on your bucket list?  Then you’re obviously very smart.  Studies are showing that knitting reduces tension, increases creativity, and helps us focus.  In this relaxed, friendly class, you’ll learn all you need to know to get started.  My goal is to give you the confidence and skills to not only knit, but knit well for a lifetime.  We’ll learn about all the basics, answer all your questions, and make some cute things, too.

Knit Your Own Project

6 Thursday evenings: November 13, 20, 27, December 4, 11, 18 from 7 – 9 pm at Yarn Forward on Bank Street. You can book your spot at www.bookeo.com/yarnforward
This is a class for knitters who know how to knit and purl and need to move on to the next stage. You select and work your own project at your own speed, and I’m there to help, encourage, and facilitate your work. I can’t wait to see the projects you’ll bring!

How to Read Your Knitting and Fix Mistakes

One 4-hour workshop: Sunday, December 7, 2014 from 1 – 5 pm at Yarn Forward on Bank Street. You can book your spot at www.bookeo.com/yarnforward

Have you ever looked at your knitting and thought, “Something looks wrong.  But I don’t know what happened!”?  If you’ve ever wondered how your stitch count went off, where that extra stitch came from (or disappeared to), or why your lace looks all wrong, then this is the class for you.  We’ll look closely at our knitting and get to know it in a new way.  Then, we’ll make some mistakes on purpose — don’t worry, I’ll be holding your hand the whole way — and we’ll fix them like superheroes.  Never let a dropped stitch or mis-crossed cable scare you again.

How to Not Hate Finishing

One 4-hour workshop: Sunday, December 14, 2014 from 1 – 5 pm at Yarn Forward on Bank Street. You can book your spot at www.bookeo.com/yarnforward

Have you ever groaned in fear at the thought of sewing seams or working a button band?  So have I.  But I’ve learned a couple tricks over the years that have made my fear a thing of the past.  Join me for this afternoon seminar where I’ll teach you the four most important finishing skills I know.

Knit a Beautiful Lace Shawl

Six 2-hour classes
Lacy shawls are in style!  We’re going to knit a simple, triangular shawl, with the kinds of techniques you’ll find in many patterns online: garter-tab cast on, a simple increase pattern that creates the shape, and a beautiful-yet-simple allover lace design.  We’ll talk about placing stitch markers, how and why to use a lifeline, how to read your lace and avoid making mistakes, and then how to fix your mistakes when they happen.  We’ll finish up with a simple and stretchy lace cast-off technique.  Then, we’ll wash and block our shawls together and sew in our ends.  When we’re finished, you’ll have something absolutely beautiful to wear and the confidence to make something more complex.
Scintillate Shawl pattern by Amanda Schwabe. www.aknitica.com #knitting  #shawls #cozy

Two-at-a-Time Toe-Up Socks

Six 2-hour classes
Are you looking for a different way to make socks?  There are so many fun methods to try!  With the two-at-a-time Magic Loop method, never suffer from Second Sock Syndrome again.  In this class, we’ll learn a special cast on for starting at the toes and a couple ways to increase them. We’ll talk about sock construction and how to modify it.  We’ll talk about toe-up heel methods and how to choose a favourite.  We’ll knit the legs, and then we’ll learn some stretchy bind-off methods so we can actually put our socks on.  We’ll also talk about knitting socks that fit and how to measure feet.
Posted on

Diving into Craftsy

I’ve just signed up for a Craftsy class!  I noticed that they’re having a sale this weekend for Black Friday, where you can sign up for courses for half price.  (Thanks, Twitter!)  So, I followed the link to see what they offered.

Well, what do you know?  They had a class that looked like it would answer some of my questions.  I’d love to start designing sweaters, but I was feeling under qualified.  I don’t want to design garments that won’t fit everyone, but how could I possibly test knit every single sweater size before publishing a pattern?  As much as I love knitting, I don’t have the time or the yarn budget.  But I also refuse to publish patterns that I’m not proud of.

Amazingly, there’s a class currently being offered called Sizing Knitwear Patterns.  How perfect is that?!?  So, I signed up.

There are lots of other interesting knitting classes being offered, as well.  As far as I can tell, all of them are online video courses, in which you can ask the instructor as many questions as you want.  Your video links never expire, so you can take your time watching them.  There are discussion forums for your class.  You can even make video notes.

(I’m not sure what that means yet, but I’ll find out soon.  I think it means I can bookmark bits of video that I want to go back to later and make notes about them.  Sounds neat, eh?)

While I was there, I figured I’d also look into the Craftsy Affiliate Program.  Now that aknitica is self hosted, I can add links to sites I find useful in my knitting life so I can share them with everyone.  As a happy bonus, I get a bit of commission from them occasionally, which should help fund my yarn sample purchases and website fees.  It turns out that Craftsy has a really incredible user-friendly program for affiliates.  (You’ll notice I have some banner ads at the side and bottom of the site now.  I added the ones I found most interesting, although right now, they’re all in their Holiday mode!)  If you have your own website, you can Join Craftsy’s Affiliate Program Today too, if you like.

I was surprised to get an added bonus from them when I got my approval email.  I get to sign up for one of their classes, for free!  haha

But I think what I’ll do is sign up for the Sizing Knitwear Patterns‘ sister course, the Pattern Writing for Knitters Online Knitting Class.  Maybe it will help me take my patterns to a whole new level of awesomeness.  That’s always a good thing.

And here’s another one that would be perfect for my Knitting Guild, since our annual knitting challenge’s theme is shawls this year.  There’s actually a Knit Shawls Class that promises to help you master lace techniques.  Darn it, now I wish I could take it, too.  Too much to do, too little time.  I so completely love taking knitting classes.

Online Knitting Class

Now, to carve out some quiet minutes to watch my videos.   In a house full of homeschooled children.  It’s a good thing there’s no time limit!  (And hey, maybe they’ll learn something.  Mwahaha….)

Have you every taken an online class?  How did it go?

[twitter style=”horizontal” source=”aknitica” hashtag=”#Craftsy” float=”left”][google_plusone size=”standard” annotation=”none” language=”English (UK)”] [fblike style=”standard” showfaces=”false” width=”450″ verb=”like” font=”arial”] [fbshare type=”button”] [pinterest count=”horizontal”]

[box]Some of the links in this post are affiliate links. But I only talk about things that actually interest me, that I hope could benefit my readers, as well.  Regardless of whether or not I make money from them.[/box]

Posted on 2 Comments

Pattern Writing for the Uninitiated

Have you ever wondered what goes into writing a pattern?   Here is my process, mostly.

Get inspired!  Pick up yarn and start knitting.  Maybe make sketches first, maybe not.

Get really excited as things come together nicely, making notes as you go.

OR,

Get really frustrated and rip things out that just refuse to work.  At all.  No matter which way you try.  Cross out notes as you go.

Finish the really exciting garment, then realize that the yarn you used from your stash isn’t widely available and also isn’t a standard aran weight, even though it says “Aran.”

Buy more yarn.  Tell yourself it’s a “business expense.”

Knit a proper sample, realizing that now all your pattern notes will have to be slightly modified to fit the new gauge.

Knit another sample because you guessed wrong and your adult-sized hat turned out to be child sized.  Also, realize that maybe bubblegum pink isn’t the best colour for showing how great the pattern looks on both men and women, no matter how much you personally love bright pink.

Attempt to take really gorgeous photos of the garment sample(s) on reluctant husband and on self.  Load the photos on the computer and realize that they are a) blurry, or b) weird, or c) showing the beautiful half-dead bouquet of flowers you received from your brother’s girlfriend at Thanksgiving in the background, or d) poorly lit because you were too excited to wait until day time.

For every good photo you see, there are about 4x more terrible ones at home on my hard drive. I apparently have dead flowers growing out of my blurry head, and you can barely even see the hat here.

Find a willing model on a gorgeous day and take lots of pictures.  Hopefully, some of them will turn out.

They did!  They did turn out!  Even the one of the willing model’s reluctant-yet-willing teenaged son, who came to ask his mom a question and found himself roped into being a model.  (Regret that you had to run off to find your two-year-old instead of getting more shots of a cool teenager wearing your design.)

Pick your favourite pictures of the garment from the photo shoot.   This might take an hour since it’s hard to differentiate between which photos make your garment look great, and which just make your model look great.  Narrow it down while sipping some coffee and ignoring your family.   Be thankful for indulgent spouse.

Crop photos.  Export photos.  Make sure you saved photos properly.

Open up a new file and start to arrange the photos.  Format the page.  Start adding the heading, sidebars, and text.  Think you’re almost done!  Realize that you still need to make a proper gauge swatch in stockinette.  Take a break to knit said swatch.

Debate on the merits of buying charting software or creating charts yourself from thin air.  Convince yourself that a table is like a chart, that your illustrating abilities are sufficient for drawing in cable symbols, and spend days creating charts that could have been made in less than an hour for the low, low price of $99.  Consider just spending the money on the darn software, then discard the idea because finances are tight even though it would be a “business expense.”

Decide that since people seem to love having both charted AND written directions, your pattern should have no less.  Even though you prefer charts.  Even though it will add a couple extra hours to the pattern writing.  Even though it will mean excellent proofreading is necessary.  Wonder if your excellent-at-proofreading sister will mind helping you out.  Again.

Confuse yourself with the changes between the hand-written chart and the final, computer-y version while you translate the chart into written directions.  Imagine all the confused emails you’ll get if the written directions are wrong and how embarrassed you’ll be at having published a sub-par pattern.

Realize that your eyes are blurring from staring at the computer screen for so long.  Instead of taking a break from the computer, take a break from pattern writing to write a blog post about pattern writing.

Make some more coffee as Go, Diego, Go! plays in the background.  Thank God for Netflix, for completed homeschooling lessons, for a napping two-year-old.   Add cinnamon to the coffee to make it more special because you need it.  Take a real break, get the kids a snack, and wish you had a magical sushi snack bar in the fridge.  Eat a bowl of cereal instead.

Get back to work.  Go to post office, park, and library with kids.  Realize at park that the p.o. box keys are not in your pocket.  Go back and find them still in the p.o. box.

Get home and make dinner.  Plan to get back to work later.

Posted on

Cozy Fall, Cozy Knitting

There’s a chill in the air around here, and the leaves have been turning rusty shades of sun-kissed orange and red, and a switch has flipped in my brain.  I’m knitting cables.

I picked up a gorgeous skein of Fleece Artist Blue-Faced Leicester Aran on sale at a local yarn shop in the summer.  It’s just brown… but oh! What a brown!  When I finally got around to winding it into a ball (by hand, off the back of a kitchen chair), I discovered that there are depths of warmth and coziness in the colours.  As it ran through my fingers, I fell in love with the texture.  It is soft and squishy and velvety, and I’m in love.

Here’s a little sneak peak of the pattern I’m working on, which, although it was inspired by this yarn, will probably be written for a worsted weight instead.  We’ll see.


I find that my favourite designs come out of experimentation, not premeditation.  Maybe that’s weird.  I will sometimes dream and imagine all the things I’d like to knit, but the reality of those dreams doesn’t always work out.  When I sit down and just get started, playing with the yarn as I go, I often end up with something very satisfying.  Cables can be especially lovely for that, since they can travel around at will as I go.  Hats make a great canvas, since they are small and easily re-knit if things go horribly wrong.

Have you ever sat down and played with a hat?  Here’s a glimpse of what I do:  Cast on something in multiples of ten, with appropriate-sized needles for your yarn, and just go for it.  Throw in some evenly spaced cables, then let them travel around when you get bored.  Maybe I’m strange, but I find that to be a fun and stimulating exercise.  The first hat I cast on ended up being too small, so, about halfway through, I ripped it all out.  The second hat was just right (since I had looked at my stitch count on hat number one before ripping it out to see how many more stitches I’d need).  I had some nice, mindless cables at the beginning, then I started to get tired of them.  Where can they go? I wondered.  So I sent them travelling to see what would happen.  I knew from previous experience knitting other peoples’ patterns how to move a cable around (most recently the Knotty gloves, of which I have made three pairs), and I knew I could always rip things out if I had to.

As I decided on one possibility, others were discarded or filed away in my brain for later.  Maybe this will turn into more than one design for a hat, or maybe there will be matching mittens.  Or leg warmers!  (My one love from the 80’s.)  Who knows?  The point is that knitting is fun, and I can go on adventures in my own kitchen, with Yo-Yo Ma playing in the background.  What a great life.

Posted on 3 Comments

Arm Warmers of Indecision

When I first started knitting, my mom rolled her eyes at me a lot because I was too stubborn to knit mittens from a pattern.  I wanted her to show me how to increase and decrease and let me figure it out myself.  After a bunch of horrible, disastrous, misshapen attempts, I made mittens.  I still knit them to this day (except now I’ve adapted them for working in the round.)  I don’t think I’ve ever knit mittens from a pattern.

So you see, I have a history of this.  Enter the arm warmers for my sister-in-law.  I want them to be just right for her, and I want to design them myself.  I also want to get them done quickly so she can wear them.  Well, three (no, four.  Drat.) weeks after she requested them, I think we can all agree they’re not getting done quickly.  In sad fact, they are in their third incarnation at this point in time.  But I’m finally feeling optimistic about them.

I was really encouraged on Monday night at my knitting guild.  Natalie Servant was our speaker, and she is so great.  (She showed me how to use my drop spindle!  And lent me a book about drop spindles!  I’ll have to ask her to explain plying to me again, though…)  Anyway, her presentation was great all around, but my absolute favourite part was when she told us about her pile of swatches at home that just didn’t work out.  Thanks goodness!  I thought, I’m not the only one.

And that’s the thing that I often forget, I think, and the reason I get discouraged sometimes:  I’m not the only one whose ideas don’t work out the first time around.  In fact, instant perfection seems to be pretty rare.

So I’ll keep going with these arm warmers, and maybe someday soon, I’ll have a new pattern to show you.  Then again, maybe not.

On another note, Fibrefest was last weekend in Almonte, and I told myself I wasn’t allowed to buy more yarn, since I’m at the point of being years behind in knitting up my stash.   (I blame that on my new favourite place in the world, Unraveled, and her incredible collection of Fleece Artist sock yarns.)  I almost caved in when fondling the yarn in the Turtlepurl booth, especially the sparkly ones, but, in the end, I persevered… and bought myself a yarn bowl instead.  I love pottery.  (Besides, I imagine Turtlepurl will have a booth at my knitting guild’s Vendors’ Night, and I’ll have to get something then.)

Here’s my new clay friend, made by Laura Sheppard of sheppardhandmade, holding the luscious Misti Alpaca that was being magically transformed into an adult-sized Impunity hat.  Isn’t it a pretty shape?

So, in spite of my indecisiveness when it comes to those arm warmers, it’s been a good knitting week.

Posted on 7 Comments

Play

So I just learned this great new way to work short rows from Cat Bordhi. She taught a class called Cat’s Sweet Tomato Heels a couple weekends ago during a four-day Cat-class-stravaganza hosted by my local knitting guild, and I’m so glad I went.

Cat’s new method of working short rows is phenomenal. There are no wraps, no gaps, and virtually no difference between turns on the knit side and turns on the purl side. Therefore, I have been freed to put short rows everywhere, with no thought to the consequences!

However, you may have noticed that the name of the class was not “Cat’s Short Rows,” but “Cat’s Sweet Tomato Heels.” You are absolutely right! Good observational skills. She has developed a great new heel that will fit on virtually any sock and is so easy to knit that once you learn it, you won’t need to follow directions again. You will be able to just slap in a heel wherever and whenever you feel like it.

These magical heels are made up of short-row wedges. I will let her do the explaining for you, since they are her heel, her Thanks Ma’s, and her idea. She has a great video tutorial here, and her book is equally recommended.

All I did was take her brilliant heel wedges and play with them.  I felt like a kid in a sand box!

But before I can tell you that story, I have to tell you this story:

You see, after Cat’s class, my friend Annie and I had to, just had to, go buy some really luscious yarn. Cat’s sample socks felt unlike any socks I’ve ever knitted, and I knew once I felt that yarn that I was missing out. I had to go find some high-quality, bouncy, springy yarn. We made our way over to one of the local yarn shops and spent a good hour or two ooh-ing and ahh-ing over all its delights. I came home with four skeins of luscious yarn: two in superwash merino sock weight, one on-sale silk/wool blend, and some on-sale Blue Faced Leicester Aran, all of it springy and delicious.

Here is the one I was most excited to knit up: a skein of Colinette Jitterbug in “fruit coulis,” reminiscent of 80’s punk-rockers and dying to be made into arm warmers or wrist bands or leg warmers. I decided to satisfy two cravings at once: I have always wanted to buy Eva some Babylegs, but as a knitter, I can’t bring myself to spend $14 on machine-knit socks with no feet. So, I decide to use the Jitterbug to make her some really amazing arm warmers, which I hoped would also double as leg warmers.

The only problem with hand-painted and variegated yarns, in my mind, is that I fall in love with them in the skein, but then I hate how they knit up! Stockinette always makes them look so blotchy and busy, and I’m invariably disappointed. And even though I loved knitting with this gorgeous yarn, the colours just weren’t working for me. As I sat, dejectedly, at my kitchen table, trying to think of an alternate stitch pattern that wouldn’t ruin the yarn, I heard the voice of one of my fellow knitting-class students bubble up from my memory: “These heel wedges look really great with my hand-painted yarn!”

And then I thought, “What if I could use the wedges in my arm warmers? I could rotate the wedges to form a cylinder.” I remembered taking a class with Lucy Neatby and her explaining that she had made a vest out of four triangles, since four triangles form a cylinder, and I figured that the wedges were somewhat triangular…

So I tried it.

For my first try, I worked the wedges to be a little more pointy than Cat recommends for a sock. In fact, I worked them until there were just 3 sts left between turns. They looked really amazing, but ended up forming tiny mountains that stuck out from the arm warmer. I’m going to file that information away for later because someday, I may want arm warmers (or whatever) that have lots of texture to them. But that wasn’t my goal with this project, so I ripped it out.

It turned out that working a heel wedge exactly the way Cat instructs, leaving about an inch of stitches between the last turns, gave exactly the effect I was going for.

(The bottom photo, above, shows what the wedges look like in the direction I knitted them.  The top photo is of me holding it upside down, if you want to call it that.)

Amazingly enough, they will fit Eva as arm warmers and leg warmers, and I can fit them on my wrists! I think that my second try made them just the right size to be long-lasting, wearable garments, since even when she outgrows them, they’ll still fit me.

Here, in a nutshell, are my instructions for making your own cylinders like mine. I’m not going to explain Cat’s method of short rows, since like I said, they’re hers. Also, she is an excellent teacher, and she’ll do a much better job than I could. 🙂 So, these instructions are assuming that you already know and understand the Sweet Tomato Heel wedges.

I used fingering-weight yarn and size 1 US (2.25mm) needles. My preferred method for working in the round is to use two circular needles, but you can easily use dpn’s or magic loop. My gauge with those needles and that yarn is about 8sts/inch in stocking stitch.   The size I made fits my 19-month-old’s arms loosely, with room to grow but without falling off right now, and stretches comfortably to fit my adult wrist.

I cast on 48 sts using Jeny’s Stretchy Slip Knot Cast On because I wanted both ends of the arm warmer to be super stretchy. It was a new-to-me technique, and I found it a little tricky at first, but the tip she gives in the end of her video fixed the problem I was having. I highly recommend you try it out! Otherwise, cast on using whatever stretchy cast on you know and are comfortable with.

Join for working in the round. Work in 1×1 ribbing for about 4 or 5 rounds.

Knit one round, then begin first wedge. Unlike while you’re working a heel wedge, work over only half the total stitches; in this case, 24. (A heel wedge is worked over two thirds of the stitches.)

After your first wedge is completed, work a wedge on the opposite half of the cylinder in the same manner. This will give you two wedges, one on each circ. Now, you might notice that you have two hollow spots left between the two hills, and your arm warmer is no longer an even cylinder. The next two wedges (wedges 3 & 4) will fill in those hollows. After completing the second wedge, perform a mental shift. Basically, in your last round of that second wedge, after you Thank Ma up the hill, you knit back down the hill and then up the next hill only halfway (12 sts, half the stitches on that circ). Then, you turn your work and start the 3rd wedge in the valley.

Work the 4th wedge in the other valley, then do another quarter rotation and start again from the beginning.

You work in repeats of those four wedges until your arm warmer is as long as you want it to be. Then, work in 1×1 ribbing for almost an inch. Cast off using Jeny’s Surprisingly Stretchy Bind Off, or whatever other super-stretchy bind off you know and like.

Don’t be afraid to play around with the rotation. You don’t have to do things exactly the way I did to get a good result, since knitting is so stretchy and resilient. I had a lot of fun just playing around to see if my experiment would work, and I was thrilled when it did!

I am also imagining using this rotating-wedge method to make really amazing socks. They would, of course, feature a Sweet Tomato Heel. 🙂 I see another trip to my LYS in the near future to get some more hand-painted yarn!

I also wonder what it would look like to rotate wedges that weren’t made over 50% of the circumference, but over 60 or 70 percent instead. Wouldn’t it be fun to find out? And what if the wedges were more narrow…..  ??

I will end now with a few more pictures:

Please show me pictures if you experiment with rotating wedges. I’d love to see them, as I’m sure Cat Bordhi would, too. In fact, I showed her these ones before I posted about them here, since they’re based pretty heavily on her design.   She has a Ravelry group you can join that is dedicated to her Sweet Tomato Heels, and I’m going to head over there now and share some of these pics!  Maybe I’ll see you there.  🙂

If you have any questions about the rotation, feel free to ask! If my written instructions are confusing, let me know, and I’ll work to clarify them and add some more pictures of the process when I can.


Cat Bordhi developed her Sweet Tomato Heel over many months, working closely with over a hundred test knitters of all skill levels. During this time she distilled her illustrations and explanations again and again, until her test knitters and tech editor agreed the instructions were as clear and perfect as possible. In order to be sure that her work is not misrepresented, Cat asks that designers who wish to use her heel in their patterns send their readers directly to her free videos as well as to purchasing links for her eBook, Cat’s Sweet Tomato Heel Socks ($20), and to the eBook’s individual patterns ($6 each). She is encouraged that many knitters have been able to work from the free videos alone; if not, the eBook or individual patterns will give you the detailed instructions, illustrations, and explanations you need.

Posted on

Meeting Cat Bordhi

I must admit, I was so nervous the morning I woke up to go to my first Cat Bordhi class.  I had already read her book New Pathways for Sock Knitters cover to cover; in fact, that was the book I picked up when I wanted to learn how to knit socks for the first time.  (And if you know me, you might suspect that I didn’t just want a book full of patterns; I wanted a book that would explain the different parts of a sock to me — one that would allow me to understand their construction so I could make them up on my own.  New Pathways was that book for me.)

You see, I became a better knitter from reading New Pathways.  Cat didn’t just write a book full of sock patterns.  She wrote a book full of knitting tips disguised as a sock-knitting book.

Would the real Cat Bordhi, I wondered that morning, be nice?  Would she like me?  I want to be a designer like her someday… Would she see anything special in me, or would I be just another student?  

Well, I don’t know how she saw me, but I sure enjoyed meeting her.  She seems to be a teacher to the core, and a good one, at that.  I believe that she really gets excited by encouraging other people.  She wants her students to excel.  She wanted us to come up with new ideas that we could turn into our own patterns, and she cheered us on through the whole process.

In short, I had a great time.  

And now, the top ten things I learned from Cat Bordhi, in no particular order:

  1. Persevere; new ideas come from the strangest of places;
  2. Play with the yarn;
  3. Use other brilliant people’s awesome techniques, and give them full credit (think Judy’s Magic Cast On and Jeny’s Surprisingly Stretchy Bind Off and Cat’s two-circ method for knitting in the round);
  4. Do good work;
  5. Come at problems from new angles to find solutions;
  6. Knitting can always get better;
  7. Any technique can be tweaked, especially if you’re determined;
  8. Knitting builds community; LYS’s are an important part of that;
  9. Good yarn is worth the money;
  10. Knitting will always be fun.  (I already knew this last one, but I love seeing it in other people, too.  It makes me happy.)


Posted on

Super Mario Charts

Feel free to use these two charts in any of your knitting projects! I had some fun making them up. 🙂 I have no idea what the copyright is for any of the Super Mario characters, so obviously these are free, and I imagine you should only use them in your own work and not sell anything made with them. And feel free to play around with the colours. I made these charts using www.tricksyknitter.com, and I think I’m really going to like that site for making more charts in the future. It was so so easy.

Anyway, here they are:

Yoshi:

And this is what it looks like in a hat:

I used duplicate stitch to do the small details instead of carrying the yarn. And for the eyes, I actually made a small decorative knot instead. You might also notice that these particular Yoshis also have tongues… They were added on as an afterthought at the insistence of my son, even though these Yoshis are NOT in their tongue-out position. I cringed sewing them on, but he was happy. They’re just a straight, basted line of red, with a little duplicate-stitch bit of red at the end.

Super Mario Bony Turtle:

And here’s what that looks like on a hat:

These hats are knit using a variation of Kate Oates’ Cheery Scrap Cap pattern. I used dk-weight yarn instead of worsted, with size 5 US needles, and I probably played around with the number of repeats, too. 🙂

Posted on

Mighty Warrior

I just finished up this chemo cap for a small friend of mine. It’s a bit of a merge between Kate Oates’ free Cheery Scrap Cap pattern and my own viking horn design, with some modifications thrown in. I’m pretty pleased with the result. 🙂

If you’re interested in making a similar one, here’s how I did this one:

I used Knit Picks Swish DK (instead of worsted weight) and size 5 US circular needles. I cast on 104 sts to make a larger version of the girls’ child-size hat (I basically added 2 more pattern repeats). I skipped the ear flaps this time, and knitted about 3/4″ of 2×2 ribbing before starting into the chart pattern. I used the girl’s pattern for this boy’s hat, but I left the heart part of the chart blank except for one tiny row of red dots.

As for the horns, you can download my pattern for them from Ravelry with this link: download now

May all the mighty warriors out there with battles to fight be strengthened by our love and prayers as we knit for them.